





Quick Answer
- Convert restricted streams to standard formats: Use a dedicated music converter to save your Spotify tracks or playlists as editor-ready local files, specifically 320kbps MP3 or 16-bit 44.1/48 kHz WAV.
- Import audio into the Camtasia Media Bin: Open TechSmith Camtasia, click File > Import > Media, choose your converted audio files, and drop them onto a separate track on the timeline.
- Refine timeline levels and dynamic ducking: Use Camtasia’s Audio Effects panel to add Fade In, Fade Out, and volume gain adjustments, or configure audio ducking so the music never overpowers your voiceover.
Background music adds polish, energy, and rhythm to software tutorials, presentations, and product demos. Yet when creators attempt to add Spotify music to Camtasia, they immediately run into format roadblocks. Camtasia requires open digital audio files, while Spotify serves encrypted streaming cache that third-party video editors cannot read or decode.
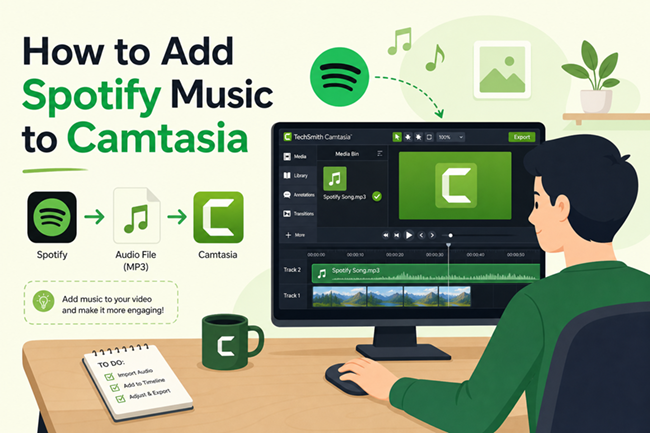
Making these tracks work in your video editor comes down to a straightforward two-step workflow. First, you convert your selected Spotify songs into an open, timeline-friendly container such as 320kbps MP3 or uncompressed WAV. After saving them to your computer, you can import them into Camtasia just like any standard media asset.
This guide explains how to set the right audio parameters for seamless timeline playback, convert your tracks efficiently, and balance your final mix inside Camtasia with ducking and volume envelopes.
- Part 1. Understanding Format Compatibility and Timeline Requirements for Camtasia
- Part 2. How to Convert Spotify Music for Camtasia with AudKit Spotify Music Converter
- Part 3. Importing and Editing Spotify Audio Tracks in the Camtasia Timeline
- Frequently Asked Questions About Adding Spotify Music to Camtasia
Part 1. Understanding Format Compatibility and Timeline Requirements for Camtasia
TechSmith Camtasia supports multi-track editing across video, voiceovers, screen captures, and audio beds. However, the media engine handles only standard, uncompressed, or universally decoded audio containers. Camtasia natively accepts MP3, WAV, AAC, M4A, and WMA.
When you save songs offline through Spotify—even on a paid Premium subscription—the client stores them as encrypted Ogg Vorbis cache segments. These files exist purely for internal playback inside the Spotify app. Camtasia cannot parse their file headers, interpret the raw data, or generate a visual waveform preview. Dragging cached streaming files directly into Camtasia will inevitably return unsupported format alerts or codec errors.
To avoid playback stutter, timeline lag, or audio desynchronization during exports, make sure your converted audio adheres to Camtasia’s core timeline specifications:
- Sample Rate Consistency: Always export your audio at standard sample rates of 44.1 kHz (standard audio) or 48 kHz (standard video). Mixing mismatched sample rates between screen recordings, voiceover clips, and background music can lead to gradual audio-video drift across longer timeline renders.
- Bitrate Encoding Mode: Choose Constant Bitrate (CBR) over Variable Bitrate (VBR). CBR ensures predictable sample spacing, helping Camtasia calculate frame-accurate playhead positions without preview hitching.
Here is how the two most popular output formats compare when editing inside Camtasia:
| Audio Format | Target Bitrate / Spec | Storage Footprint | Camtasia Timeline Impact | Best Use Scenario |
|---|---|---|---|---|
| MP3 | 320 kbps (CBR) | Low (~2.4 MB/min) | Minor CPU decoding during preview | Great for long background beds, podcasts, and keeping overall project archives compact. |
| WAV | 16-bit, 44.1/48 kHz (PCM) | Moderate (~10 MB/min) | Zero decompression overhead; instant scrubbing | Ideal for complex multi-track timelines, rapid cuts, heavy audio ducking, and frame-accurate sync. |
For standard presentations and tutorials, 320kbps MP3 files provide clear acoustic fidelity with minimal storage overhead. If your edit involves heavy track splitting, custom equalization, or noise reduction filters, converting your tracks to 16-bit uncompressed WAV provides the smoothest real-time scrubbing performance.
Part 2. How to Convert Spotify Music for Camtasia with AudKit Spotify Music Converter
Because Camtasia cannot parse streaming audio feeds, the first stage involves exporting your chosen music into open local files. AudKit Spotify Music Converter solves this format incompatibility by converting your streaming playlists and individual tracks into timeline-ready formats suitable for video production.
Why Use AudKit Spotify Music Converter for Video Projects
Preparing audio for video editing requires clean sound, accurate timing, and fast batch processing. AudKit Spotify Music Converter offers several practical features built around these production demands:
- Pristine Fidelity and ID3 Tag Retention: Retains full audio quality alongside title, artist, and album tags, helping you keep your Camtasia Media Bin structured and recognizable.
- Timeline-Matched Audio Parameters: Allows you to adjust output bitrates (up to 320 kbps) and sample rates (44.1 kHz or 48 kHz), eliminating sample rate mismatches and rendering drift.
- Universal Format Support: Exports tracks, full playlists, or podcast episodes into MP3, WAV, AAC, and FLAC containers.
- Fast Batch Conversion: Operates at up to 5x conversion speed on Windows, allowing you to export complete background music libraries in a single session.
Step-by-Step Tutorial: Convert Spotify Audio for Camtasia
Use the following step-by-step process to download and convert your selected Spotify tracks into local audio files ready for Camtasia.
Step 1. Launch AudKit Spotify Music Converter
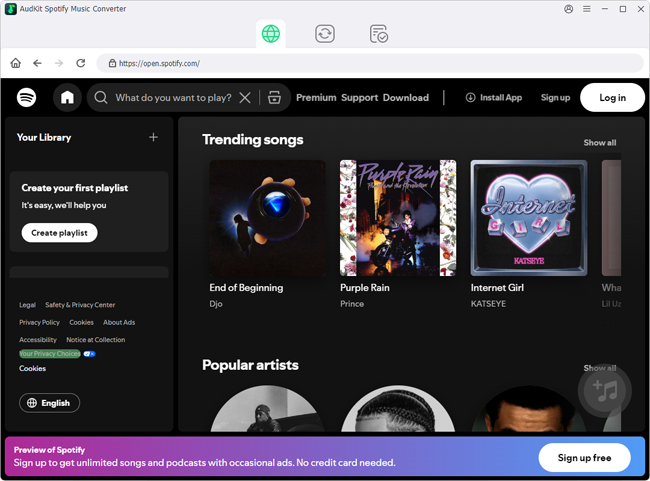
Download, install, and open AudKit Spotify Music Converter on your computer. When the software opens, the built-in Spotify web player loads automatically. Log in with either a Free or Premium Spotify account to reach your saved library.
Step 2. Select and Import Tracks or Playlists
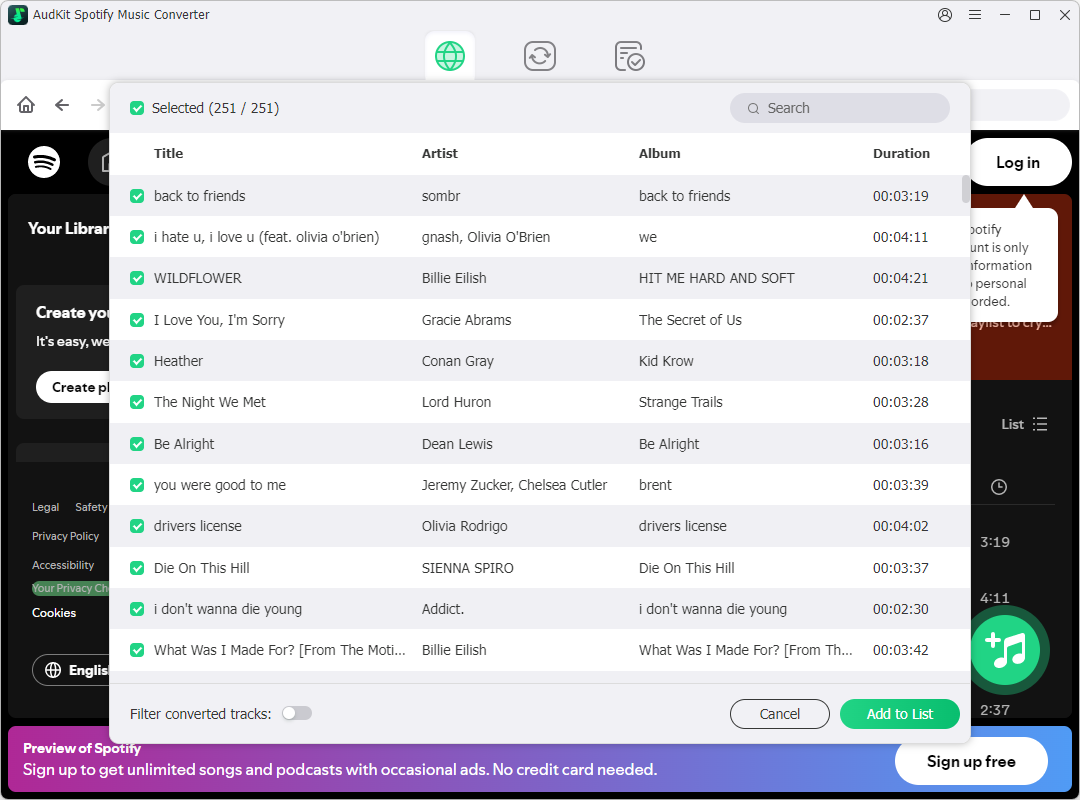
Locate the music tracks, sound beds, or playlists you intend to use in your video edit. Open the playlist or album, then click the orange Add (“+”) button in the lower-right area to send the songs into the conversion queue.
Step 3. Configure Output Parameters for Camtasia
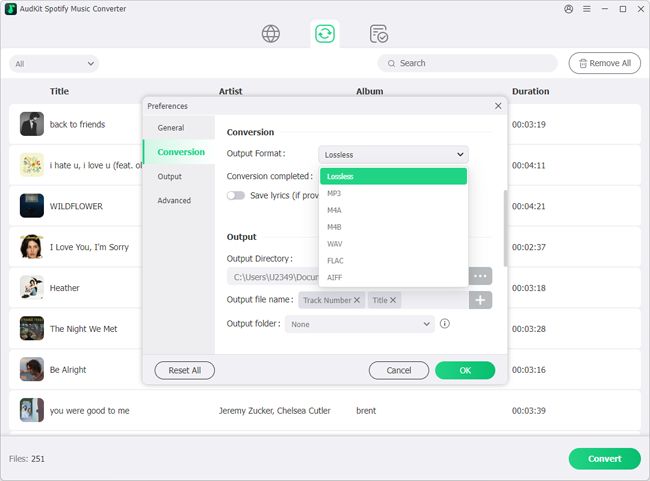
Open the top Menu and click Preferences > Convert. Match your export options to Camtasia’s project requirements:
- Format: Select MP3 (for smaller project footprints) or WAV (for instant timeline scrubbing).
- Sample Rate: Set to 44,100 Hz or 48,000 Hz to match your Camtasia canvas and microphone recording settings.
- Bitrate: Set to 320 kbps for clear, high-quality audio reproduction.
- Channel: Keep set to Stereo (2 Channels).
Click OK to save your preferences.
Step 4. Convert and Save Audio Files Locally
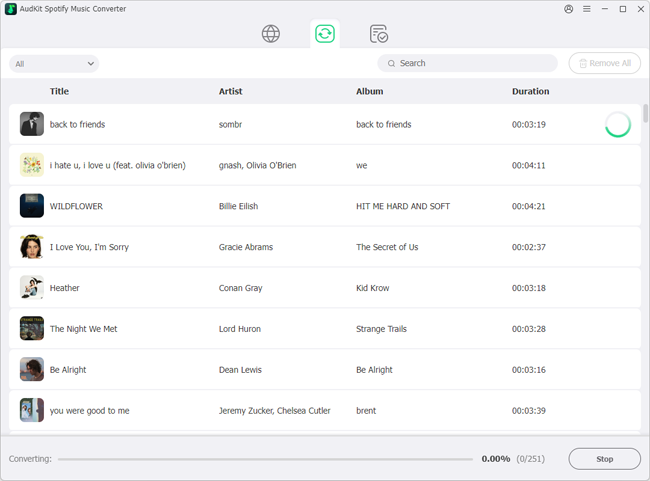
Click the Convert button in the lower-right corner. AudKit Spotify Music Converter will batch-convert your queue and save the resulting files to your designated local folder. Once finished, click the Converted folder icon to inspect your standard MP3 or WAV files, fully prepped for Camtasia.
Part 3. Importing and Editing Spotify Audio Tracks in the Camtasia Timeline
Import Converted Audio via Media Bin
Keeping your media organized inside the Media Bin makes assembling multi-track timelines straightforward and helps prevent missing asset errors later.
- Open TechSmith Camtasia and load your editing project.
- Go to File > Import > Media, or use the keyboard shortcut Ctrl + I (Windows) / Cmd + I (Mac).
- Navigate to the folder containing your converted audio files, pick your tracks, and click Open.
- Drag the imported audio track from the Media Bin onto an empty track below your screen capture and microphone voiceover.
Balance Background Levels with Audio Ducking and Gain
Background audio should support your dialogue without competing for clarity. Adjusting track gain and applying ducking ensures your speech cuts through cleanly.
- Open the left sidebar and select the Audio Effects tab (click More > Audio Effects if it is not visible).
- Drag the Audio Compression or Ducking effect directly onto the music clip on your timeline.
- Open the Properties panel on the right side of the interface to inspect the controls.
- Lower the master Gain slider on the music track (typically to around -18 dB to -24 dB, or roughly 10% to 20% total volume) so spoken dialogue remains fully intelligible.
Apply Custom Fade In and Fade Out Envelope Points
Hard audio starts and abrupt cuts make video edits feel unfinished. Use custom audio points to build smooth transitions:
- Create Audio Points: Double-click the green volume line running through the audio clip waveform to generate adjustable volume anchors.
- Create a Gentle Intro: Pull the opening anchor down to 0%, placing the next point 2 to 3 seconds in to create a smooth fade-in.
- Set Up Outro Transitions: Add two points near the end of your clip, pulling the final anchor down to 0% to prevent sudden cutoffs.
- Align with Video Edits: Position your fade-outs to finish alongside visual transitions, lower thirds, or outro title cards.
Frequently Asked Questions About Adding Spotify Music to Camtasia
Why does Camtasia show an unsupported format error when I add Spotify music to Camtasia?
Spotify stores offline tracks in proprietary, encrypted cache containers that video editing software cannot decode. To add Spotify music to Camtasia, you need to convert your chosen songs into open formats such as MP3 or WAV using AudKit Spotify Music Converter first.
Which output format (MP3 vs. WAV) delivers smoother playback on the Camtasia timeline?
Uncompressed 16-bit 44.1/48 kHz WAV files offer the fastest timeline scrubbing and editing response because Camtasia does not need to decode them on the fly. For longer projects where disk storage is a priority, 320 kbps MP3 files deliver dependable playback with minimal resource usage.
How do I prevent converted background music from overpowering voiceover narration?
Reduce the background music track’s volume in the Properties panel to around 10% to 20% (-18 dB to -24 dB). You can also apply Camtasia’s native Audio Compression effect or add timeline audio points to lower the music automatically beneath spoken sections.
Can I monetize YouTube videos that include background music converted from Spotify?
No. Converting tracks is intended strictly for personal backup and non-commercial editing of content you are authorized to access. Using copyrighted commercial music in public YouTube videos will trigger automated Content ID claims, mute your soundtrack, or disqualify your video from monetization.
Conclusion
Learning how to add Spotify music to Camtasia allows you to build engaging, well-paced soundtracks for tutorials, presentations, and personal video edits. By converting your tracks into open formats like 320kbps MP3 or 16-bit WAV with AudKit Spotify Music Converter, you bypass format limitations and import clean, responsive audio straight into your Media Bin.
To keep your project playback smooth, match your audio sample rates to 44.1 kHz or 48 kHz, and use Camtasia’s volume points and ducking tools to balance your background music against your voiceover. Managing your converted audio responsibly ensures a reliable, professional video editing process.

Andrew Rowley
 Staff Editor
Andrew Rowley has over 10 years of writing experience and is good at writing in audio technology and audio converter software. He can provide high-quality articles to help streaming music lovers explore music better.