Apple Music is a great music streaming service that brings to your ears a clear quality of over 100 million songs on its app or web browser. Apple Music offers you a 1-month trial subscription that upon expiry, you will need to upgrade to continue enjoying your hits. If you’ve not subscribed yet, perhaps learning how to record from Apple Music can open a great avenue for you to stream your music without limitation. Without further ado, the next sections will lead you to the content about how to record your tracks from Apple Music on various OS devices like Windows, Mac, and iPhone with free or online tools to keep them as yours.
- Part 1. Record from Apple Music via AudKit Apple Music Converter
- Part 2. Record from Apple Music for Free Online
- Part 3. Screen Record Apple Music with Audio on Windows
- Part 4. Screen Record Apple Music with Sound on Mac
- Part 5. Screen Record Apple Music on iPhone
- Part 6. FAQs about Apple Music Screen Recording
- Part 7. Conclusion
Part 1. How to Record from Apple Music via AudKit Apple Music Converter
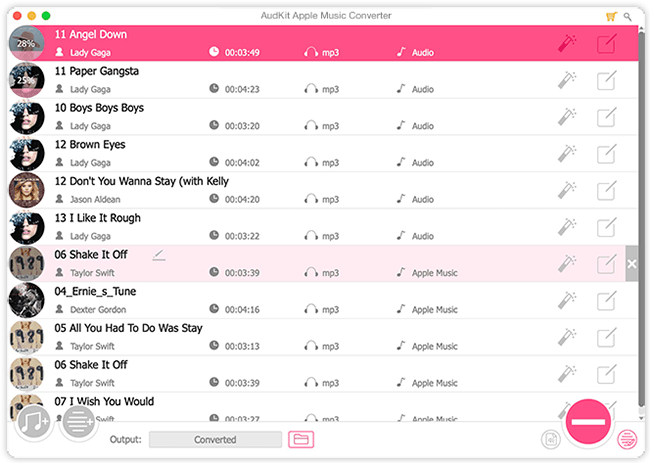
The first option to do Apple Music screen recording is via the AudKit Apple Music Converter. This brilliant downloader can convert your Apple Music to several output formats like M4A, AAC, MP3, FLAC, and more. Henceforth you can keep all your tracks in your iTunes library or transfer them to any device for listening without a subscription.
The AudKit Apple Music Converter will help you create high-quality audio files by customizing its output settings and will also keep the ID3 tags of your Apple Music audio such as genre, album, artist, and title. It is equally fast in its conversion speed which can manage up to 30X faster speed. Besides, the converter supports batch conversion to download up to 100 audio items at once. Not only you can upload songs from Apple Music but also iTunes songs, audiobooks, and Audible books. With a built-in splitter, you can carefully split large audiobooks into smaller sections.

Main Features of AudKit Apple Music Converter
- Support importing Apple Music, iTunes items, Audible books, and local files
- Convert Apple Music to popular output formats like MP3 and FLAC
- Keep Apple Music original quality, including ALAC Lossless easily
- Play tracks from Apple Music offline on multiple devices and players
How to Record Apple Music Songs with AudKit Apple Music Converter
AudKit Apple Music Converter can be downloaded to Mac and Windows operating system computers. Tap the “Download” button from its official website and get ready to start the trip on Apple Music recording.
Step 1 Install AudKit Apple Music Converter
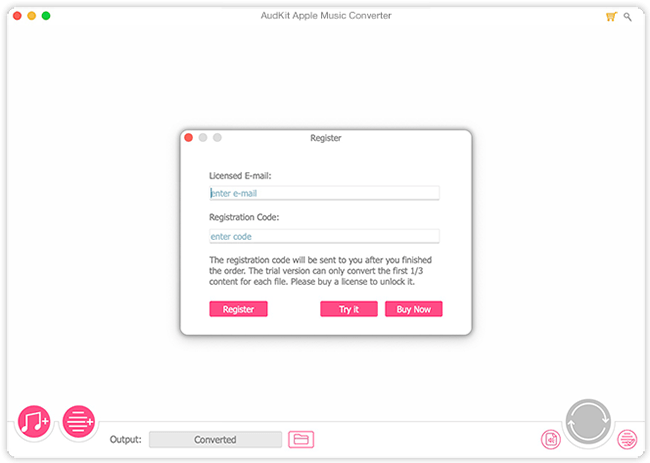
Once the AudKit Apple Music Converter is set up on your device, launch the app immediately. Then, on its main interface, register it through the “Menu” bar > “Register” option then, input your license key as required.
Step 2 Add your Apple Music songs to AudKit software
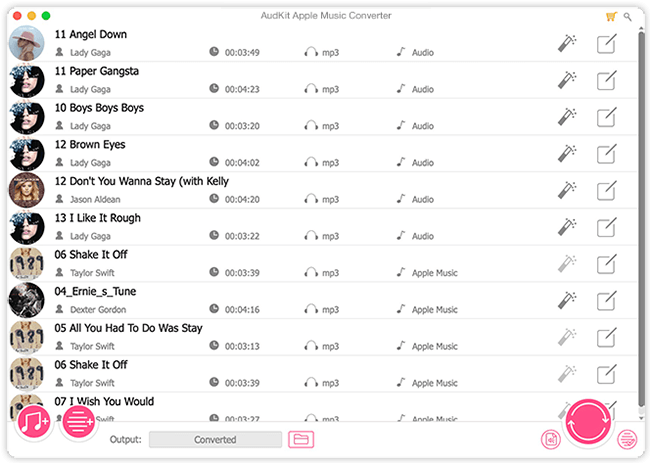
Next, to get your Apple Music on the converter, hit the first “Add” button to load music from your music library. From the popup, click Apple Music from the left side and then select the music tracks you want to get them offline.
Step 3 Customize the audio output for Apple Music
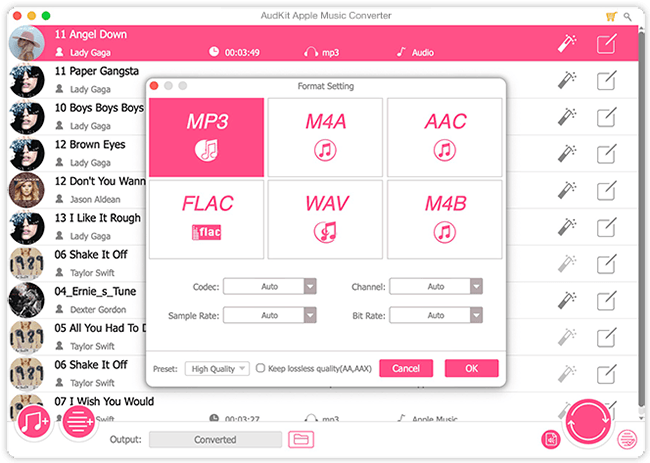
Once you add the Apple Music tracks, click the “Audio” icon to customize the output formats to MP3, AAC, M4A, etc. Meanwhile, you can customize other parameters like channel, bit rate, and codec to get the best listening experience.
Step 4 Start converting Apple Music songs
Finally, click on the “Convert” tab to start converting Apple Music to MP3 or another common output format that you set before. It should take some minutes to complete the Apple Music downloading. After the process is done, locate the converted Apple Music from your computer folder, and you now can play Apple Music anywhere.
Part 2. How to Record from Apple Music for Free Online
Soundloaders is an online Apple Music recorder that lets you extract and download tracks from Apple Music online to MP3 format. It is compatible with a desktop browser and mobile device. It is easy to use if you are wondering how to record music from Apple Music without downloading any app.

Step 1. Go to a playlist in the Apple Music app or Web Player.
Step 2. Click on the “three-dots” at the end of each Apple Music track, then click on the “Share” > “Copy Link” option.
Step 3. Once you have accessed the music link, go back to the “Soundloaders Apple Music Downloader” website.
Step 4. Then paste the music link in the text input and hit on the “Search” tab to load the music information.
Step 5. Finally, click on the “Download” tab to rip your songs from Apple Music.
Pros
- No installation of the app is required
- It is free of use
Cons
- It only supports MP3 output format
Part 3. How to Screen Record Apple Music with Audio on Windows
TunesKit Screen Recorder is an Apple Music recording software that lets you audio capture your tracks in just a few steps. You can record any audio and save them in common output formats. Learn how to record Apple Music songs with audio on Windows using the TunesKit Screen Recorder via these steps.

Step 1. Open TunesKit Screen Recorder and then also launch the iTunes program on your Windows computer.
Step 2. Then, click on the “Audio Recording” mode and enable the “System Audio” option you are recording from.
Step 3. Touch on the “Gear” icon and set MP3 as the output format.
Step 4. Now, hit on the “REC” tab and go to iTunes to play the Apple Music tracks that you want to record.
Step 5. Once done with the recording, click on the “Stop” tab and all the recorded Apple Music tracks will be saved to your computer. You can preview and edit the tracks from the “Tag” icon before saving them.
Pros
- Save your recordings into output formats such as FLAC, WAV, MP3, etc.
- It supports recording any sound from your computer
Cons
- The output quality is not as lossless as other converters
Part 4. How to Screen Record Apple Music with Sound on Mac
QuickTime is another Apple Music recording app that lets you record your music with sound on Mac. This app is a built-in Mac app that you can use to play and record your screen with sound.
Step 1. Go to the “Finder” option and open the “Applications” tab on your computer.
Step 2. Then, open the “QuickTime Player” option.
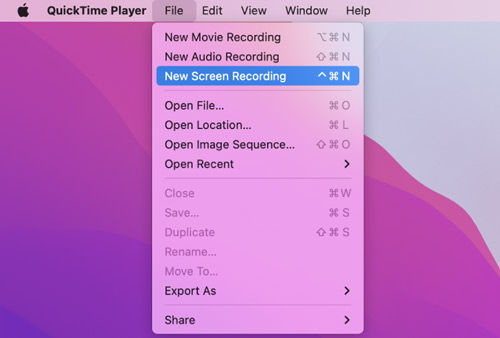
Step 3. Next, find the “File” option in the Menu bar and select the “New Audio Recording” option.
Step 4. Select the file quality and mic by clicking on the “Bottom-pointed” arrow located next to the “Record” button.
Step 5. Click on the red “Record” button.
Step 6. Once the recording process is completed, press on the “Stop” tab to finish and save your audio on your Mac.
Pros
- It is in-built into Mac OS devices
- Widely available with a simple and focused design
Cons
- It lacks advanced features and the screen recording is limited to only the “.MOV” format
Part 5. How to Screen Record Apple Music on iPhone
iOS devices make Apple Music screen recording easy as they have a built-in recording feature. More so, it is free, suiting users of all levels. Here is how to record Apple Music on iPhone.
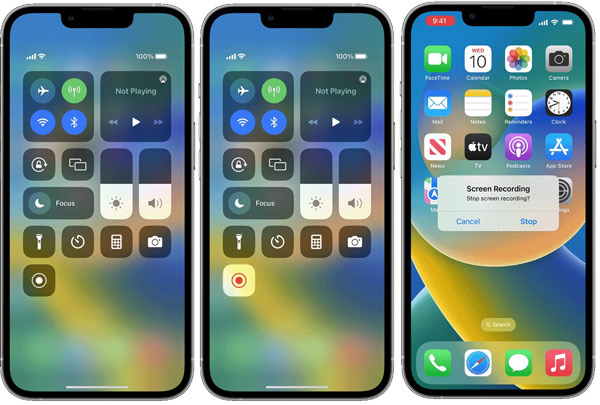
Step 1. First, go to the “Settings” > “Control Center” > “More Controls” option and click on the “+” sign next to the Screen Recording option to add the “Screen Recording” icon to the “Control Center” on your iPhone.
Step 2. Then, tap on the “Start Recording” tab under the “Control Center” option. Next, open the “Music” app on your iPhone then play and record your Apple Music of choice.
Step 3. Once done with the recording, hit on the “Stop” tab and your Apple Music hits will be saved to your iPhone directly.
Pros
- It is free to use
- Easily capture the screen with Apple Music on your iPhone device
Cons
- It lacks an edit function
Part 6. FAQs about Apple Music Screen Recording
Many users are still looking for in-depth solutions when it comes to how to record from Apple Music. These answers are solutions to the commonly asked questions.
Q1. Why Can’t I Screen Record Apple Music?
That’s because Apple Music adds protection to its files to prevent usage outside its browser or app. You, therefore, have to remove the restriction first before you can screen-record the files.
Q2. How to Fix Apple Music Screen Recording with No Sound?
If you realize Apple Music screen recording has no sound issue, you need to resolve it by swiping up your screen to bring up the “Control Center“. Then, find the “Screen Record” icon. Press and hold it until the “Microphone Audio” option appears. Next, tap on the “Microphone” icon to turn it to “Red“. Then turn the sound ON and OFF several times to test if it now works.
Q3. How to Add Audio Recording to Apple Music?
Go to the “Music” app on your Mac computer and choose the “File” > “Add to Library or File” > “Import” options. Next, locate a file or folder with the recordings to import, then click on the “Open” tab to add your recordings.
Part 7. Conclusion
It is breadth-taking to not worry over the question of “Why can’t I screen record Apple Music.” Even though Apple Music restricts its files, this article just shows you the best options on how to record from Apple Music on different devices with various recording software. They can also save the recording into compatible output formats. Choose to screen record online or by installing an app that’s compatible with your device. Enjoy it!

