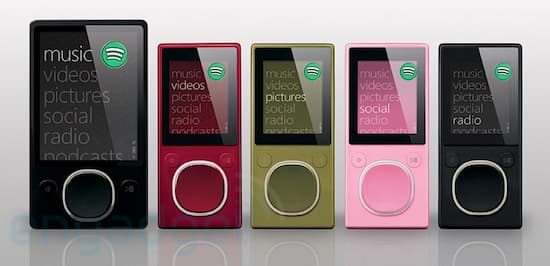
In the footsteps of Apple, Microsoft emerged with their first-ever MP3 player. Zune Player runs Windows operating system, with about 4,500 subscribers back in 2011. Even though this player was not widely articulated after Microsoft announced that it was moving away from the MP3 player, many fans still kept this gem for all good reasons. It harbors a robust social media appendage, enabling you to send songs wirelessly and even decode different sound formats. More so, this player lets you view artist information, recommendations, photos in the “Artist” tabs section. This makes it an awesome choice to move your Spotify to Zune player and keep the fire burning.
And being that Spotify offers over 60 million tracks, you wouldn’t run out of choices. It is just that you can’t directly stream Spotify to an MP3 player due to restrictions on its files. You first need to convert the files to playable formats to enable transfer to an MP3 player and other devices.
- Part 1. Tool to Add Spotify on Zune Player
- Part 2. Steps to Download Spotify Music on Zune Player
- Part 3. Bottom Line
Part 1. Required Tool to Add Spotify on Zune Player
That said, a reliable tool is all you need. AudKit SpotiLab Music Converter is a fast option when you want to import Spotify to Zune player. It will quickly convert your songs to common output formats, letting you play them offline without further limitations of Spotify songs. With AudKit, you’ll enjoy all the benefits of Spotify Premium without the need to upgrade. These include eliminating ads, enabling unlimited skips, and getting your music for offline playback on any device and player.
This app is available to load all types of Spotify audios from Albums, Playlists, Audiobooks, among other types. The output quality is lossless, as it retains all the ID3 tags and information such as track numbers, genre, album, etc. And when it comes to adding audio tracks, AudKit can load up to 100 audio tracks from Spotify in one click.
Main Features of AudKit Spotify Music Converter
- Convert Spotify to MP3 at 5X speed
- Batch conversion and 100% quality output
- Offline playback of your converted music
- Allows unlimited skips of songs and removes ads
Part 2. Download Spotify Music on Zune Player – 3 Steps
FAudKit works in simple steps to download and convert your songs for offline playback. Follow these steps to download Spotify music on Zune player. AudKit supports both Windows and Mac operating system computers. Choose the version of your computer and head to download the app from the official website.
Step 1 Import Spotify songs to the AudKit app
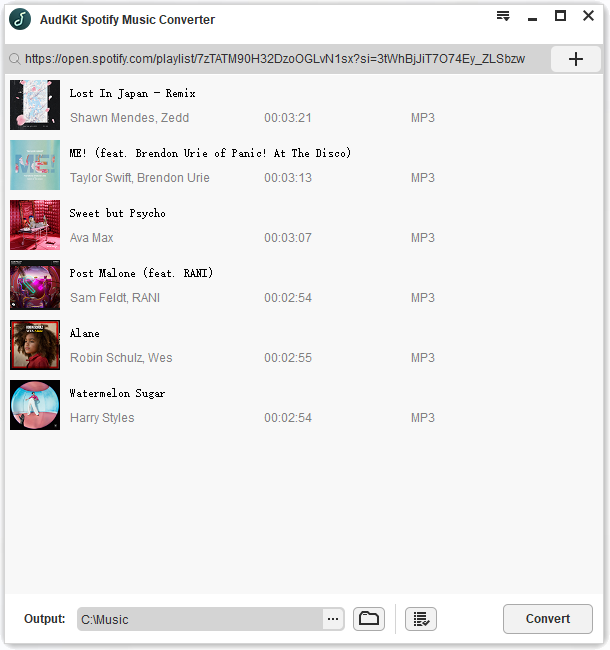
After a quick installation to your computer, launch the AudKit app. The Spotify app also opens automatically. You can then go ahead to browse for the songs you wish to convert for offline listening. Just select and add your songs by dragging and dropping them to the AudKit interface. Likewise, you can copy the URL of the song to convert and paste it to AudKit’s search bar. Then hit the “+” icon to load your selected songs to AudKit for conversion.
Step 2 Customize output preference for Zune Player
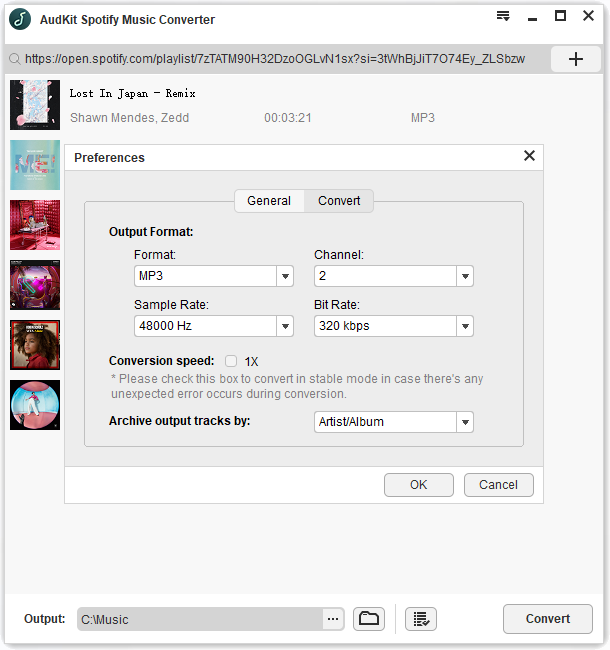
Move ahead to customize the output format and other parameters. Just click the “Menu” icon, hit the “Preferences” tab then, click on the “Convert” section. You will get into the “Settings” page where you can now customize the output settings. Select your preferred channel, sample rate, bit rate, etc. Also, choose the output format as MP3 format.
Step 3 Convert Spotify audio files for Zune player
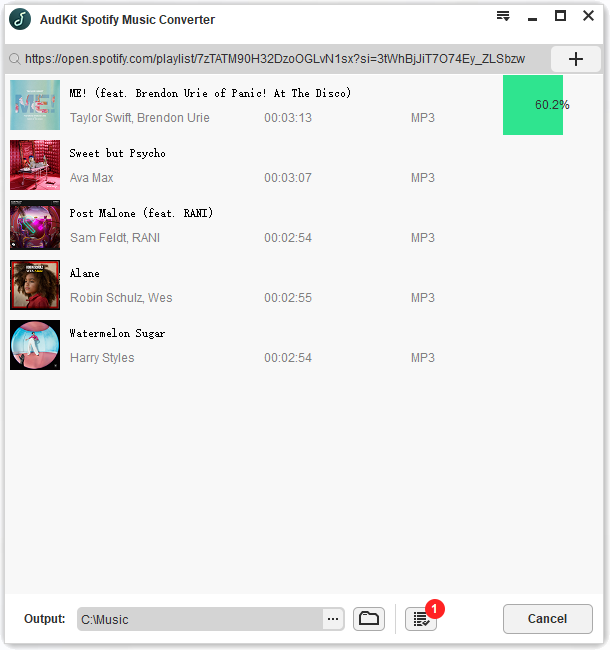
Once your selection is good for you, click on the “Convert” tab and AudKit will begin the download and conversion process. When completed, check for the converted Spotify songs in the “Converted” music folder of your computer’s local disk. You are now free to add Spotify to Zune player via the next steps.
Step 4 Stream the converted Spotify songs to Zune player
AudKit just downloaded and converted your Spotify music to common output formats like MP3. And since Zune supports WMA and MP3 audio formats, you can now add your files for offline playback with these steps.
Step 1. Use a USB cable to connect the Zune MP3 player to your computer. Wait for the computer to recognize the player and then double-click on the player device in the file explorer section.
Step 2. Locate the “Converted” folder which harbors the converted Spotify songs from your computer. Simply drag and drop them to the MP3 player. You can also right-click the Converted folder and click the “Send to” option to move them to the MP3 player.
Part 3. Bottom Line
It is a surprise you can enjoy Spotify Premium from the Free version. With AudKit, you don’t need a Spotify Premium account to enjoy advanced features like unlimited skips and ad-free content. AudKit Spotify Music Converter will eliminate all restrictions, and let you enjoy your songs on any device and player like Zune. Once converted, just add Spotify to Zune player and stream anywhere without being connected to the internet.


4 replies on “How to Import Spotify Music to Zune Player”
Will it work with a Zune 30?
Sure! AudKit Spotify Music Converter can help you download and convert Spotify music to MP3 audio files, and then you can play them on Zune 30 with ease.
Do I have to register or purchase a package before I can convert music from spotify to my zune player?
Yes, you need to purchase the full version to download the whole Spotify songs. Otherwise, you can only download the 1-minute of each song. To unlock it, please choose your plan: https://www.audkit.com/purchase/spotilab-music-converter-mac.html