
Many Apple Music users are interested in checking their most played songs history on Apple Music for various reasons. For example, some people may want to share their most played Apple Music songs with friends or on social media as a way to showcase their music taste. So, is it possible to check your listening history with Apple Music and share it with others? Fortunately, there is a professional online tool called Receiptify, which can help you track your listening progress. In this article, we will guide you on how to use Receiptify with Apple Music in detail.
- Part 1. What Is Receiptify?
- Part 2. How to Use Receiptify with Apple Music
- Part 3. How to Share Receiptify Apple Music
- Part 4. How to Download Songs from Apple Music Receiptify
- Part 5. Receiptify Apple Music not Working? Reasons and Solutions!
- Part 6. Receiptify for Apple Music Alternatives You Can Use
- Part 7. FAQs about Receiptify for Apple Music
- Part 8. In Conclusion
Part 1. What Is Receiptify?
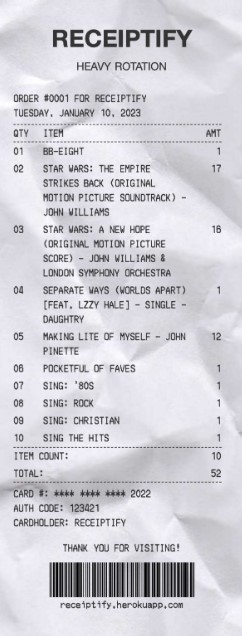
Receipity is a third-party online tool providing 10 top-played songs from Spotify and Apple Music for users of the last month, last 6 months, or all time. You can track your Apple Music listening history and generate receipts after logging in to your Apple Music account with Receiptify. It’s important to note that Apple Music API currently only supports “Heavy Rotation”, which offers insights into your most frequently played tracks, albums, and playlists but you cannot define the time period. But you can still make Receiptify Apple Music and share it with your friends.
Part 2. How to Use Receiptify with Apple Music
In order to help you get an Apple Music receipt, we will provide a complete tutorial on how to use Receiptify with Apple Music step by step in the following.
Step 1. Go to the Receiptify official website.
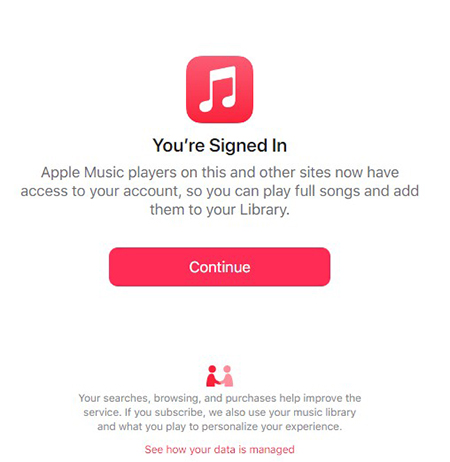
Step 2. Click on “Log in with Apple Music”. After reading the agreement, tap on “Agree” to log in to Receiptify with your Apple Music account.
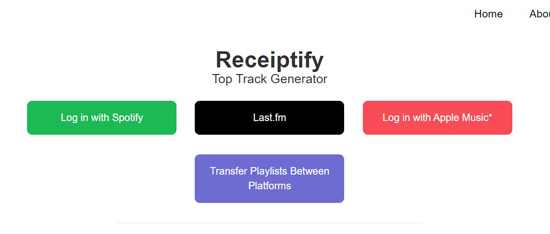
Step 3. After logging in with your Apple Music account, your Receiptify for Apple Music will automatically appear.
Part 3. How to Share Receiptify Apple Music
Now, you are able to make monthly or all-time Receiptify Apple Music. If you want to share your music taste with Receipity for Apple Music on social media with others, you can follow the simple steps below.
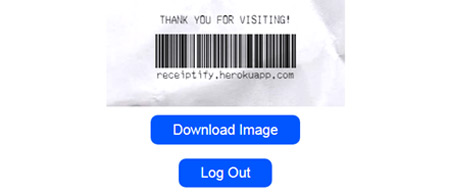
Step 1. After you get the Receiptify, you can save it by clicking on “Download Image” > “Download”.
Step 2. The Receiptify is saved to your mobile or computer currently. You can launch social media such as Twitter, Instagram, Facebook, etc. to share with other music enthusiasts.
Part 4. How to Download Songs from Apple Music Receiptify
From the above introduction, you already know how to make and share Receiptify for Apple Music. Do you want to download songs last month even all time from Receiptify? Here we will introduce the best way for you to download them so that you can listen to your favorite Apple Music offline.
AudKit Apple Music Converter is a proficient tool to convert and download Apple Music to common formats including MP3, AAC, M4A, etc. Additionally, it is able to reach a conversion speed of up to 30X while keeping high audio quality. Also, the AudKit Apple Music Converter enables you to define the Apple Music audio quality depending on your preferences, and it supports keeping and editing ID3 tags such as title, artist, and year.
With the help of AudKit Apple Music Converter, you can download your most played songs on Apple Music from Receiptify to listen to them permanently and share them with your friends directly. If you are interested in it, you can follow the guide below.
Main Features of AudKit Apple Music Converter
- Download and convert Apple Music to MP3, AAC, M4A, etc.
- Keep and edit ID3 tags such as title, album, title
- Customize the audio attributes such as sample rate and bit rate
- Listen to Apple Music offline anywhere
How to Download Songs from Apple Music Receiptify via AudKit Apple Music Converter
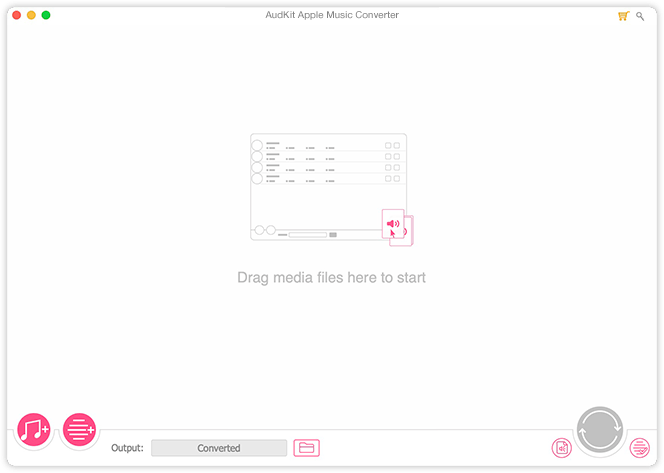
Step 1 Install AudKit Apple Music Converter and Add Apple Music
Click on the “Download” button to install AudKit Apple Music Converter to your computer. Once open the AudKit app, iTunes or the Apple Music app will be launched immediately. You can select songs or playlists from Apple Music by tapping on the first button in the bottom left to import them from the iTunes library. Besides, you can click on the second button if you’d like to add songs from your computer folder.
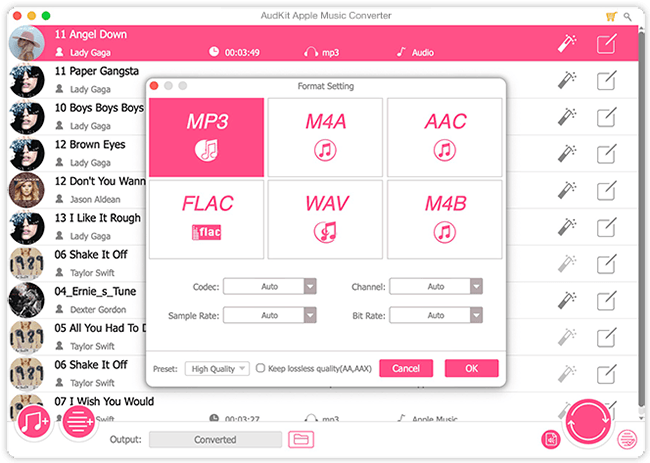
Step 2 Customize the Output Format of Apple Music Receiptify
Tap on the “Format” icon to select the output format you want to convert to, including MP3, FLAC, WAV, etc. Also, you can choose the audio quality such as sample rate and bit rate for Apple Music.
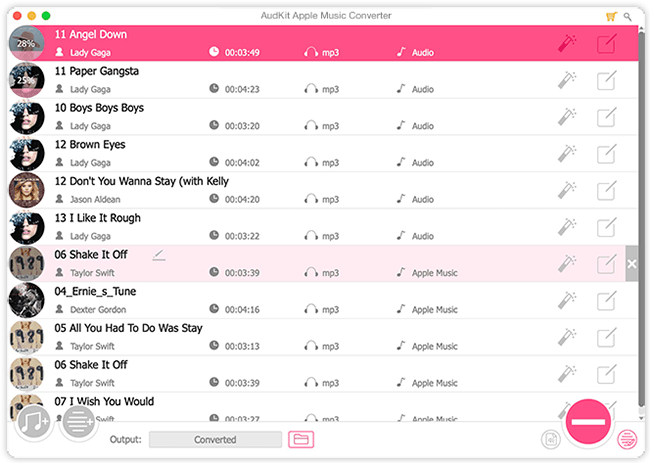
Step 3 Convert and Download Receiptify for Apple Music
After confirming the output format and audio attributes, you can start to convert and download Receiptify Apple Music by hitting the “Convert” icon in the bottom right. When the process is done, the Apple Music files will be saved to your local folder automatically, you can tap on the “Folder” icon at the bottom to check. Now, you can listen to Apple Music offline without an internet connection.
Part 5. Receiptify Apple Music not Working? Reasons and Solutions!
Are you failing to make Apple Music Receiptify? It may not work for Apple Music due to several reasons. If you are troubled with this issue, in this part, we will explore some possible causes and solutions for you.
Why Won’t Receiptify Work for Apple Music
The blocked pop-up is the primary cause of Receiptify for Apple Music not working. If you’re unable to use Receiptify, it’s probably because the settings on your device have enabled pop-up blocking. Another possible reason for the issue could be increased traffic. At times, when the website encounters a sudden surge in the number of users, it could affect the functionality. Also, there are other reasons that might motivate the Apple Music Receiptify not working.
Fix Receiptify Apple Music Not Working
If you are having problems with Receiptify for Apple Music not working, you can try the following solutions to fix it.
1. Check Internet Connection
Make sure your device is connected to the internet and the connection is stable to use. A network problem may cause a connection failure with Receiptify.
2. Enable Pop-Ups on Browsers
You can turn pop-ups off on the browser settings to disable pop-up blocks on Receiptify and try again to see if it works now.
3. Clear Cookies and Site Data
Sometimes refreshing the site can help you fix the Receiptify website not working. You might need to clear your cookies and site data if that doesn’t work.
4. Re-Login Apple Music Account
You can also try logging out of your Apple Music account and logging back in to check if there’s something wrong with your account that causes Receiptify not to work.
5. Restart Your Device
Restarting your device can help resolve any temporary issues that may be causing the problem. You can restart your mobile or computer device to fix this issue.
6. Use Another Browser
Check if Receiptify is compatible with your current browser by changing to another browser. Maybe it will work with a different browser.
7. Contact Receiptify Support
If none of the above solutions work, you can contact Receiptify support on the Receiptify official website for further assistance.
Part 6. Receiptify for Apple Music Alternatives You Can Use
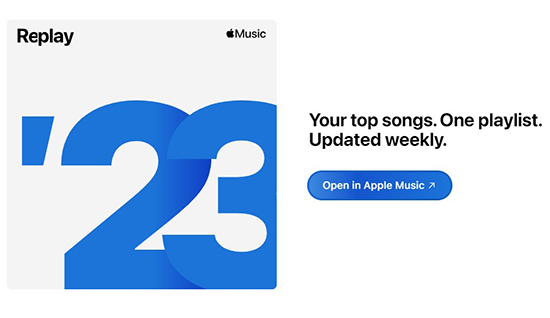
Are you looking for Apple Music Receiptify alternatives? If Receiptify doesn’t work for you, there are some alternatives similar to it to track your listening history on Apple Music. Here we would like to introduce Apple Music Replay for you, which is a feature that allows users to view the number of plays to Apple Music songs and the amount of time spent on listening to Apple Music over the course of a year. To access Apple Music Replay, you can follow these steps in the following.
Step 1. Visit the Apple Music Replay website.
Step 2. Hit on “Get Started” and sign in to your Apple Music account.

Step 3. Enter your Apple Music account password and tap on “Continue”.
Step 4. Now you can look through your Apple Music Replay including total minutes listening to Apple Music, artist-play milestones, and most-loved music makers, etc.
Step 5. You can also click on “Open in Apple Music” to access your favorite songs of the year in an all-in-one Apple Music playlist.
Part 7. FAQs about Receiptify for Apple Music
💡Q1: Is Receiptify Safe for Apple Music?
A: Yes, Receiptify is safe for Apple Music. Your data won’t be stolen and all your account information is only used for showing the listening history of Apple Music.
💡Q2: Does Receiptify Work with Apple Music?
A: Of course. Receiptify is able to work with Apple Music, Spotify, and Last.fm. You can explore your listening trends and music taste through Receiptify.
💡Q3: Is Apple Music Receiptify Free?
A: Yes, Receiptify for Apple Music is free to use. However, it requires a subscription to Apple Music in order to use its features.
💡Q4: Why Doesn’t My Apple Music Receiptify Display Top Tracks by Time Period?
A: Receiptify may not have the capability to display top tracks by time period as it relies on the data provided by Apple Music. The Apple Music API can only support displaying top played tracks without a defined period.
Part 8. In Conclusion
In the above paragraphs, you can learn how to use Receiptify with Apple Music and share it with your friends. If there is something wrong with Receiptify, you can also use an alternative way we mentioned before to get a receipt from Apple Music. Besides, it’s highly recommended to download your frequently played songs from Apple Music via AudKit Apple Music Converter for offline listening without any problems.

Andrew Rowley
Andrew Rowley has over 10 years of writing experience and is good at writing in audio technology and audio converter software. He can provide high-quality articles to help streaming music lovers explore music better.