Music streaming platforms like Spotify have revolutionized the way we consume music. With millions of songs and playlists available at our fingertips, it has become easier to discover new music and share our favorite tunes with others. Whether you’re an avid music lover, a business professional, or just someone who wants to enjoy their favorite songs with the world, we all want to share music with our loved ones.
However, sharing a playlist from Spotify via email can be tricky, as the platform does not provide a direct option. If you want to email Spotify playlist to a friend or colleague, don’t worry – there are several ways to get the job done. In this article, we’ll explore the three ways to send a Spotify playlist in an email so that you can share your musical taste with anyone, regardless of their Spotify account status. Let’s dive right in.
Part 1. How to Embed Spotify Playlist in Email with Link
Whether working on a project with coworkers or sharing music for a presentation or event, sending a playlist through email might be handy. Artists and music business professionals can also use it for advertising new releases or sharing their work with others. Here’s how you can share your favorite Spotify playlist with others with the link:
Step 1: Launch Spotify on your home computer.
Step 2: Click the playlist’s name on the left sidebar to open it. In addition, the app’s top search box can be used to locate a certain playlist.
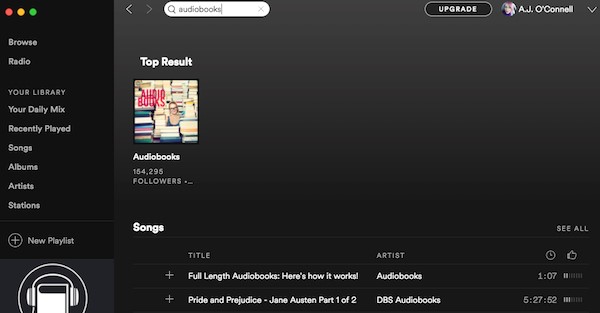
Note: This is the place to go if you want to listen to or share a playlist that someone else put together.
Step 3: To access the playlist’s options, click on the playlist’s name.
Step 4: Use the menu that appears after clicking the three dots adjacent to the green “Play” button. A sub-menu will unfold. The available sharing options will be shown after you click the Share button.
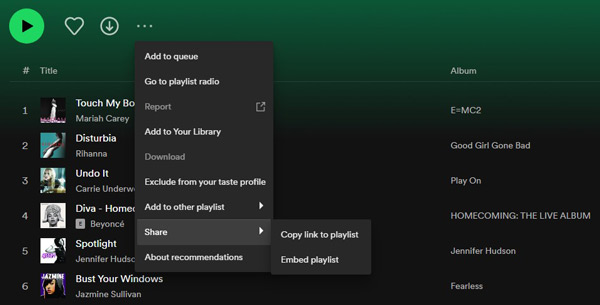
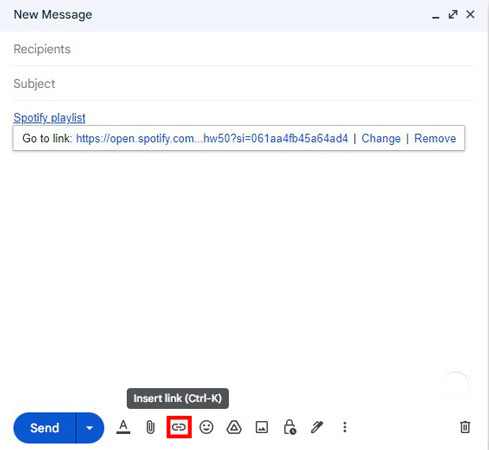
Step 5: Choose an option to share the playlist, like Facebook or Twitter, or click Copy Link to Playlist. The URL can then be copied and pasted into an email for sharing Spotify playlist.
Part 2. How to Send Spotify Playlist Text in Email via Exportify
Exportify is a third-party application that enables users to export and move their Spotify playlists to other music streaming services or local storage. Users can convert their Spotify playlists into several formats, including CSV, JSON, and plain text, using Exportify. Exportify is particularly handy for those who want to migrate from Spotify to another music streaming service without losing their well-created playlists. Follow the steps below to use Exportify:
Step 1: Visit the Exportify website. Choose the Get Started button on the new web page that has opened.
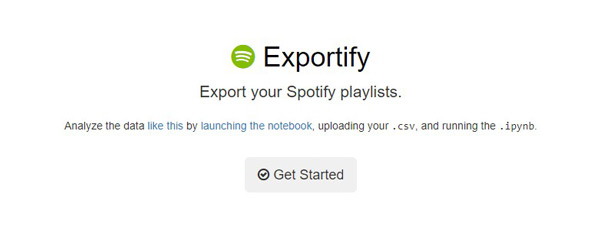
Step 2: To use Exportify with Spotify, you must log into Spotify inside Exportify. Finally, ensure the page has only read-only access to your playlist.
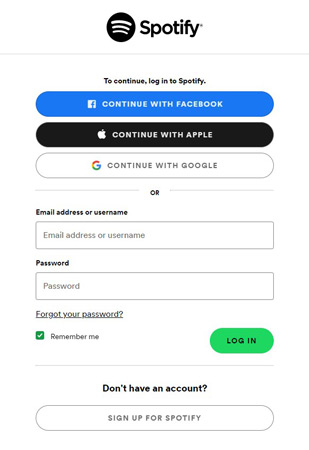
Note: Afterwards, it will indicate on the screen that Exportify is linked to Spotify. If you create a playlist, it will be uploaded to the website.
Step 3: At the press of an Export button, you can export Spotify playlists to text, a comma-separated values (CSV) file.
Step 4: If you want to export all your playlists simultaneously, select this option and then click Export All. As a zip file containing a CSV file, it will save your Spotify playlist.
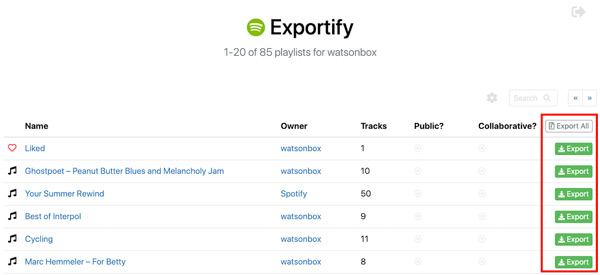
Note: If you want to keep track of information like the playlist’s artist, Spotify URL, track number, and time, exporting it as a .csv file is the way to go. Any further changes you make to the CSV file will be saved as a Text file, which is viewable in any web browser.
You will then send the text file with Spotify to others by email, and that’s how to share a Spotify playlist via email after exporting.
Part 3. How to Email Spotify Playlists with Downloaded Music Files
If you want to send a Spotify playlist to someone through email but want them to listen to the songs even if they don’t have internet access or the Spotify app, you can do so by attaching downloaded audio files. On the other hand, Spotify does not have an easy way to save playlists as downloadable MP3s. The music conversion software AudKit Spotify Music Converter is ideal for this purpose.
With the help of this robust third-party program, you can download Spotify music and playlists in various formats, such as MP3, AAC, FLAC, WAV, and more. With AudKit’s cutting-edge technology, you can be assured that your downloaded music will keep its high quality and ID3 tags.
AudKit Spotify Music Converter also boasts a rapid 5X conversion speed, allowing you to convert an entire playlist in no time at all without sacrificing audio quality. In addition to its obvious email-sending use, this program is fantastic for Spotify users who wish to take their favorite tracks with them when they go offline.
Main Features of AudKit Spotify Music Converter
- Batch convert Spotify songs to MP3 and other formats
- Allow users to share Spotify in email and play it anywhere
- Download Spotify songs locally without premium at 5X speed
- Retain original ID3 tags and lossless audio quality of Spotify tracks
How to Convert Songs from the Spotify App
Download AudKit Spotify Music Converter by clicking the Download button above. The Spotify desktop app will open after you’ve launched the AudKit converter. Then, follow the step-by-step guide to get Spotify as a local file.
Step 1 Access and add Spotify to AudKit converter
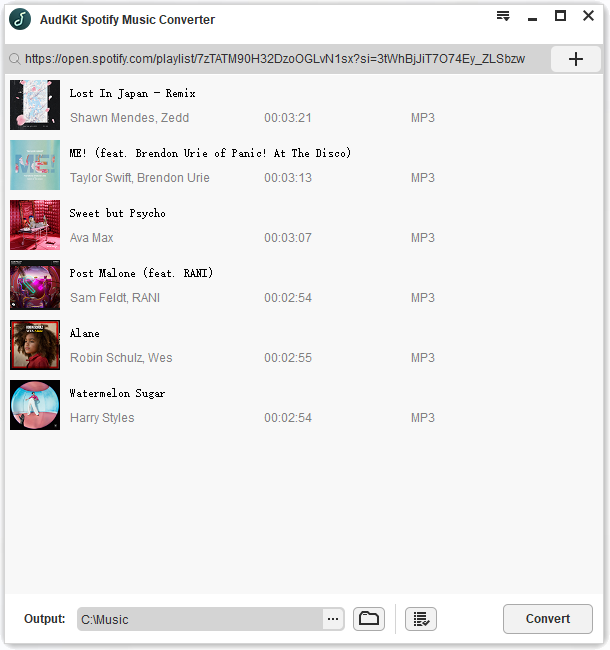
Now, open the Spotify app and access the app’s music library to choose any song, album, or playlist you wish to convert. Right-click on the selected track, tap Share and then choose Copy Music Link. Paste this URL into AudKit’s built-in search bar and press the + icon to load all the tracks. On the other hand, music from Spotify can also be added to the converter by dragging and dropping.
Step 2 Reset the audio output for Spotify playlists
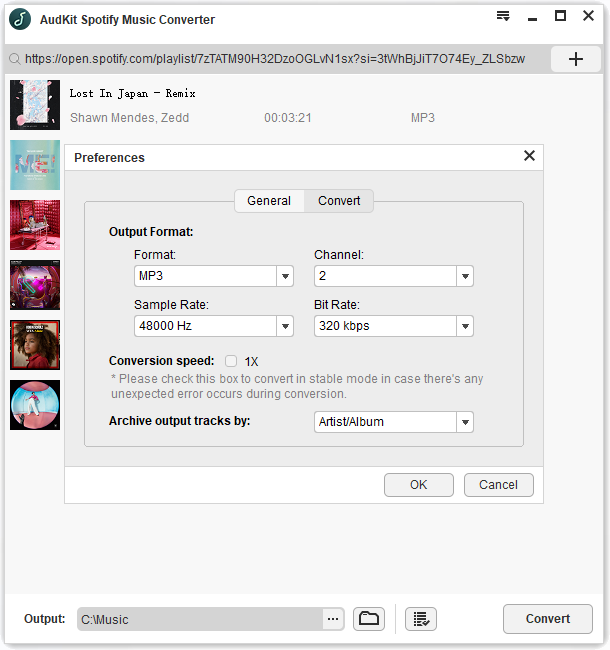
Next, navigate to the top menu bar and press the Menu icon > Preferences. On this window, choose the conversion parameters as per your needs. You can change the output format to MP3, AAC, M4A, M4B, FLAC, or WAV. Plus, the channels, sample rate, bit rate, and method of saving output tracks can also be changed. Remember to save your settings by tapping OK.
Step 3 Download Spotify as local files for sharing
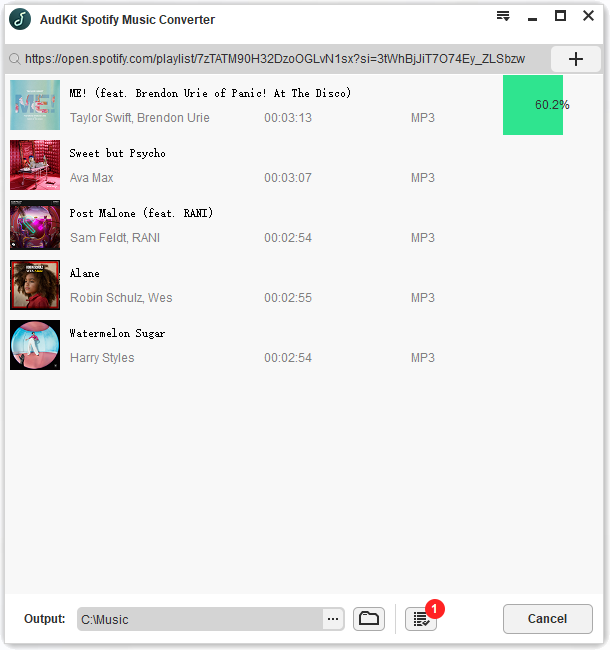
Start the downloading conversion of Spotify by hitting the Convert button at the bottom of the screen. The converted Spotify tracks will be stored in the local folder on your computer. When all is done, it’s easy to get the Spotify playlist to where you want.
How to Send a Spotify Playlist in an Email
It’s all good to go! You now can share your Spotify just with a few steps. Here’s how to attach a Spotify playlist in email.
Step 1. Open the email website and log into your own account.
Step 2. Tap the + button to create a new message.
Step 3. Click on the paperclip icon, and select the folder with downloaded Spotify files to attach them in the email.
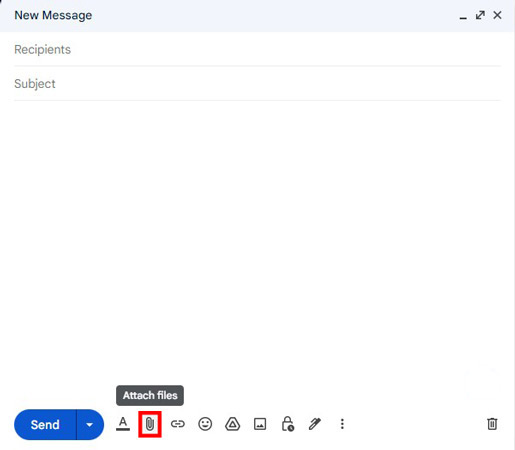
You can also just drop the songs or folder right away into the text part, it will be added as attachments.
Part 4. Final Thoughts
Whether you’re using Spotify for work or pleasure, sending a playlist to a friend through email is a great way to share the music you’re listening to with the world. We’ve gone through the three best methods to email Spotify playlist. Each way has its benefits and drawbacks, but if you take the appropriate steps, you can email people links to your favorite tunes from Spotify.
AudKit Spotify Music Converter is a highly recommended utility for people who wish to go the extra mile and attach downloaded music files to emails. It’s a strong and flexible program that can help you easily download Spotify songs and playlists and convert them to other formats for limitless playback.


1 reply on “Best 3 Ways to Email a Playlist from Spotify”
I’m in the trial period for Spotify. And I’m glad you play my albums. I’m listening to my music and then you throw some wacky mellow. Elevator music in that. I absolutely do not listen to any of that type of music or whatsoever and sence you Control what gets played I guess I am, I forwarning you that if you keep playing the mellow yellow and it keeps playing then I’ll cancel my subscription. all you do is lose your customer, but I really like Spotify. I’ll go with someone else. Because it’s not what I write, download my music or. Or play my music for some Elvira music. Turn off the off the wall off, track music music. You just feel that you can throw it in any time you want. I don’t think so. Shout, give me a response or are you to do nothing? And then if I hear it again and again ‘llI just cancel because of what you’re doing wrong.
thank you and I hope for both of us it works.