The emergence of 3D videos has even increased brand recognition like never before. Concepts in animated videos are more exciting and effectively convey the intended messages. A renowned 3D video editor is Blender, which is a free, open-source tool available for all platforms. Blender also comes with a built-in video sequence editor that lets you edit your video, add animation, music, and also perform more complex tasks like color grading. The thorn in the flesh now for most users is how to add Spotify to Blender for background music during video editing.
That’s what this article is here to explain. Spotify music streaming service offers an endless number of tracks, going up to 60 million. Users have all the reasons to incorporate their favorite hits into that much-awaited video during production and editing. But again, Spotify doesn’t allow streaming of its music on non-Spotify apps or browsers. It ensures a tight encryption mechanism that inhibits the playing of its music outside its platform. However, we have the solution to edit Spotify music in Blender on this topic. Roll down for the best solution!
- Part 1. Add Spotify to Blender Video Editing with AudKit
- Part 2. Download Spotify to Blender Video Editing
- Part 3. How to Edit Spotify in Blender Video Editing App
- Part 4. Conclusion
Part 1. How to Add Spotify to Blender Video Editing with AudKit
You need a reliable tool to eliminate any encryption on Spotify music and make it playable on any player or video editor like Blender.
The AudKit Spotify Music Converter is the most reliable tool for both Mac and Windows users. It will losslessly convert Spotify playlists and music in just 3 steps, keeping 100% lossless sound quality and ID3 tags from the original songs. By this, the raw metadata such as track numbers, titles, albums, artists, is 100% preserved in the output files. That makes it easy to access and manage your Spotify tracks in the Blender project.
Main Features of AudKit Spotify Music Converter
- Convert Spotify music to MP3, M4A, and other common output formats
- Speed up to 5X conversion rate during the conversion
- Preserves raw metadata and ID3 tags, giving 100% original quality
- Allow to edit Spotify songs in Blender and other video editing apps
Besides, AudKit enables you to enjoy the original Premium features with your free version subscription. There will be no Ads interruption and you can listen to your tracks in any order, including skipping songs without limits. And when it comes to the rate of conversion, you can add up to 100 audio tracks for download at once as it works faster at a real 5X speed, which is pretty higher than other converters.
Part 2. How to Download Spotify to Blender Video Editing
With the right tool, moving Spotify to Blender video editing software is not an impossible task. AudKit has quick steps to download and convert Spotify playlists for offline playback. Download and install the AudKit app on your computer. Then, register it for a full-function experience. To do so, click on the “Menu” tab and hit on the “Register” option. Then copy and paste the license email and registration code to the respective bars.
Step 1 Import Spotify songs to AudKit
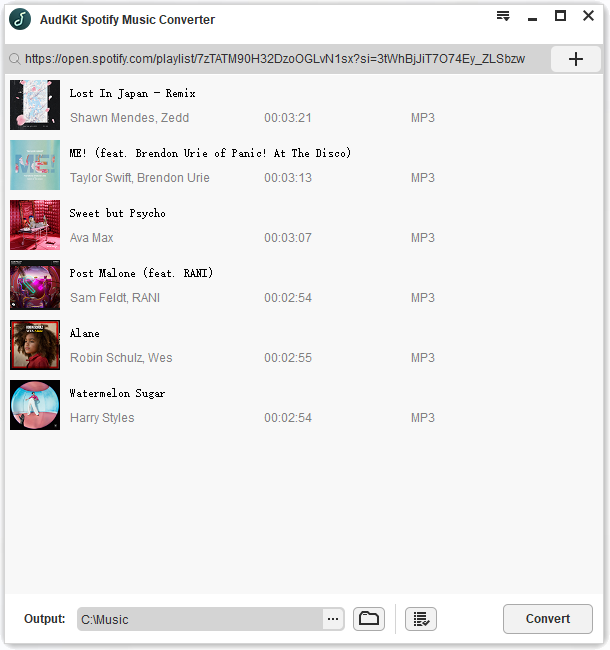
When you launch AudKit on your computer, the Spotify app will also open automatically. Now start to add the songs you wish to convert from your Spotify music library into the AudKit interface. Just right-click on your song selection, hit on the “Share” tab, and go to the “Copy Song Link” option to paste the Spotify link into AudKit’s search box interface. Then click on the “+” tab to import the playlist. Alternatively, drag and drop the Spotify music files to the AudKit interface to add them.
Step 2 Customize the output attributes for Blender
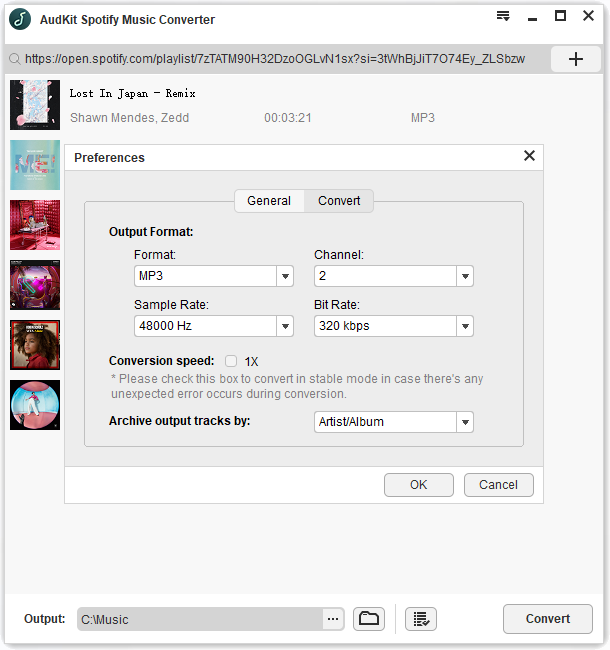
Here, click on the “Menu” tab and go to the “Preferences” option to choose conversion precepts. Reset the output format and customize other audio attributes like bit rate, sample rate, channel, etc., and then click on the “OK” button.
Step 3 Download Spotify music to Blender
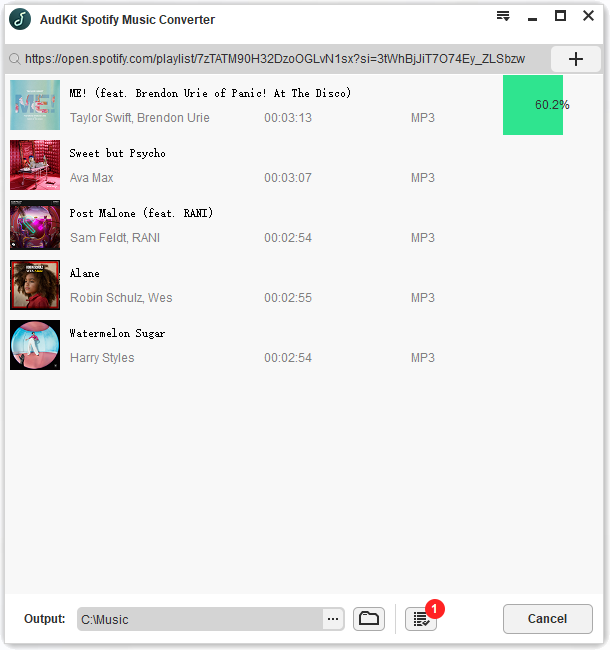
The final step requires you to click on the “Convert” button and let the program convert your music to the set attributes. Your “Converted” Spotify music will then be available in the “Converted” folder on your computer’s local disk. Peruse through them to add Spotify music to Blender then go down to video editing with appealing background music.
Part 3. How to Edit Spotify in Blender Video Editing App
You are now just an inch away to stream Spotify music to Blender video editing. Follow these steps and enjoy your favorite Spotify hit on your 3D animation video.
Step 1. Launch the Blender video editing app then go to the top row.
Step 2. Click on the “+” button in the sub-menu of “Video Editing”.
Step 3. Then click on the “Video Editing” tab and navigate to your sound file. This will be the “Converted” Spotify playlist in your computer’s local disk.
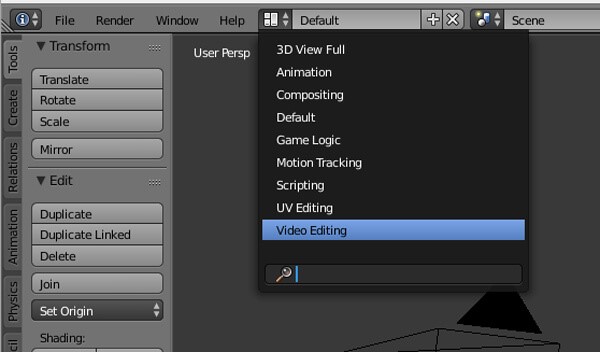
Step 4. Drag and drop the Converted Spotify playlist anywhere into the Blender’s sequencer.
Step 5. Your sound file will be added to your video and you can now set it as background music for offline playing.
Part 4. Conclusion
It is breathtaking to incorporate your special hits on that 3D video. AudKit makes it possible to get any song from Spotify for video editing. And when you wonder if Spotify blend is only for Premium? Definitely no! You can enjoy all Premium features even on your free version with AudKit and take your video editing experience to a notch higher.

