When you are going to edit a video, good video editing software is necessary. When it comes to video editing, you may first think about Adobe Premiere Pro, which is short for PR. It’s a powerful and functional tool that can satisfy almost all your needs. But it is not so kind to new users. Therefore, if you want to find an easy-to-use video editor, Final Cut Pro is a good choice for you. It’s a program designed by Apple. It enables you to do multiple designs and is easy to operate. If you used to edit videos with Final Cut Pro, you may find that using Spotify music in Final Cut Pro is failed. So, how to add Spotify music to Final Cut Pro? You will find the answer in this post.
- Part 1. Can You Use Spotify Music in Final Cut Pro?
- Part 2. Convert Spotify Music to MP3 for Final Cut Pro
- Part 3. Add Music from Spotify to Final Cut Pro
- Part 4. The Bottom Line
Part 1. Can You Use Spotify Music in Final Cut Pro?
To begin with, you are supposed to know whether can you use Spotify music in Final Cut Pro or not. Unfortunately, you are not able to directly use Spotify music in Final Cut Pro. Why? Because Spotify music is encrypted with a unique OGG format. It’s the protection of its copyright. Maybe it’s good for artists, but it’s unfair to users. Even if you have downloaded the songs on Spotify, you didn’t own them. You can only listen to them on the Spotify app or Spotify web player.
Therefore, if you want to remove this restriction, you need to transfer the Spotify OGG format to a plain format. That’s what many Spotify lovers are seeking so as to enjoy Spotify music without limitations. Thanks to AudKit SpotiLab Music Converter, this restriction is not a problem. Using AudKit SpotiLab Converter, you can convert Spotify OGG format to MP3 and other plain formats without any effort. Then you are able to add Spotify music to Final Cut Pro and use it as normal.
AudKit is a powerful Spotify converter for both Spotify Premium and Free users. It enables you to download and convert Spotify songs, albums, and playlists to multiple kinds of formats including MP3. After converting, you can enjoy 100% lossless Spotify music offline on your computer’s local music player. What’s more, the 5X conversion speed ensures you a good user experience. And you can customize the output settings according to different device needs. Using AudKit, enjoying Spotify anywhere anytime is not a dream.
Main Features of AudKit Spotify Music Converter
- Help to add Spotify music to Final Cut Pro with ease
- Convert Spotify music to MP3 for Final Cut Pro
- Download Spotify music as local files on your computer
- Listen to Spotify music offline without Premium
Part 2. How to Convert Spotify Music to MP3 for Final Cut Pro
Now you can install AudKit SpotiLab Converter by clicking the “Download” button in Part 1. Note that you need to choose the correct button according to your computer system. After that, you can follow this part’s tutorial to convert Spotify music to MP3 for Spotify Final Cut Pro.
Step 1 Add music from Spotify to AudKit
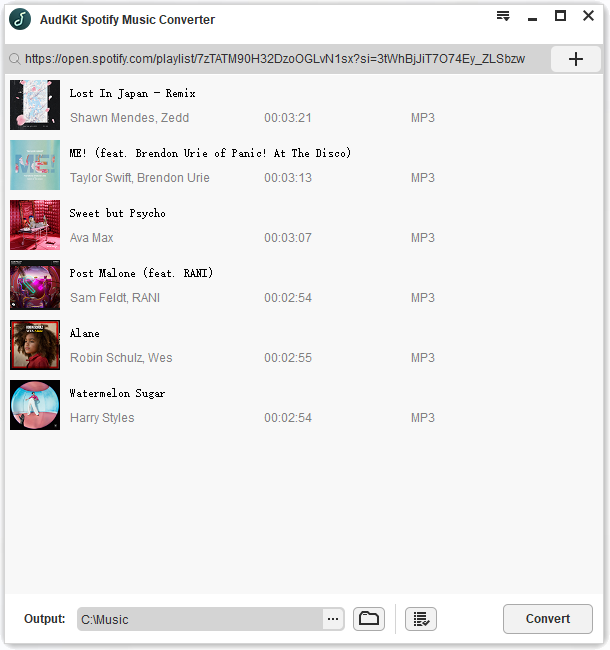
Open the AudKit on your computer. At the same time, Spotify will be launched automatically. You can browse your Spotify to find songs that you would like to use on Final Cut Pro. Then right-click the song, and choose “Share” > “Copy Song Link” to copy Spotify URL. Paste the URL into AudKit’s search bar at the top. Or you can choose a simple way to add Spotify music to AudKit. That is you can drag and drop your desired songs to AudKit’s main interface.
Step 2 Adjust output settings for Spotify Final Cut Pro
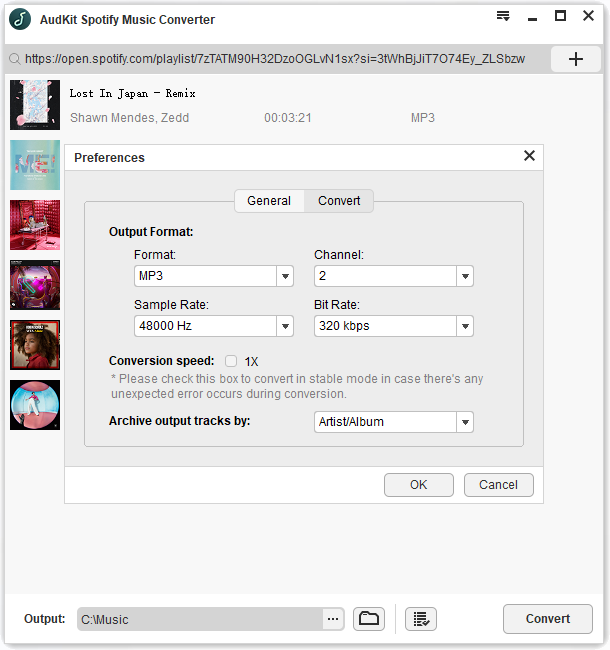
AudKit enables you to customize the output format and other parameters according to your different needs. Click the top menu icon and choose the “Preference” option. On the showing window, click the “Convert” section. Now you can choose the MP3 format as the output format. And you can do other adjustments including channels, sample rate, and bit rate per your need.
Step 3 Convert Spotify music to MP3 for Final Cut Pro
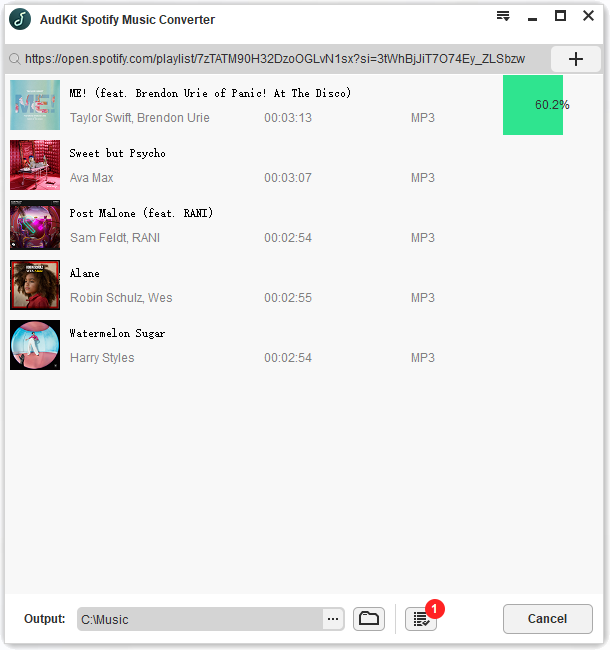
When all the settings are designed, you can click the “Convert” button at the main interface to launch the conversion process. AudKit will start converting all your added Spotify songs to MP3 at a faster speed of 5X. During the conversion, you can still add Spotify songs to convert. After conversion, you can get unprotected Spotify music in MP3 format on your computer. Then you can add Spotify music to Final Cut Pro for use as normal. Also, you can transfer and play Spotify on multiple devices you want.
Part 3. How to Add Music from Spotify to Final Cut Pro
By doing all the steps above, you will get the compatible format with Final Cut Pro. Now you can move Spotify music to Final Cut Pro and use them to edit your video as normal. Here is the tutorial on how to add music from Spotify to Final Cut Pro.
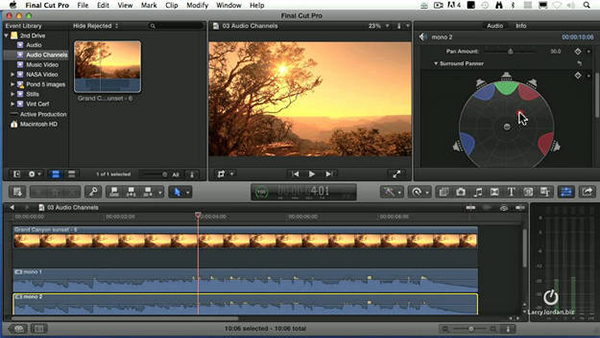
Step 1. Open Final Cut Pro. Click the “Photos and Audio” button at the top left. Then click the “Windows” > “Go To” > “Photos and Audio”.
Step 2. Click “Music” from the Photo and Audio sidebar. Then you can select Spotify music to add to the software.
Step 3. Drag and drop the Spotify music to the Final Cut Pro timeline. Until now, you have successfully added music from Spotify to Final Cut Pro.
Part 4. The Bottom Line
Thus, this is the whole tutorial on how to add Spotify music to Final Cut Pro. Due to the digital rights of Spotify, you cannot view the added Spotify music on Final Cut Pro. You need to first convert Spotify OGG format to MP3 or other plain formats. With the help of AudKit SpotiLab Music Converter, you can easily convert Spotify music to MP3. Then adding music from Spotify to Final Cut Pro is easy to achieve. The most important thing is that you don’t need to be a Spotify Premium user. You can use it to get Spotify music downloaded as local files. You can listen to Spotify music offline without Premium on any device you want.

