Do you love listening to your favorite Spotify tracks on the go or don’t want to miss the playlist while on a trip – Google Drive can help you! And the best way to enjoy Spotify music offline is to upload it to a cloud storage platform named Google Drive. This platform allows you to store up to 15 GB of files for free.
However, one major issue faced by most of the users is that even with a premium Spotify account, you cannot download music to your local storage for offline playback. And while that wasn’t enough, Google Drive only supports limited audio formats to be uploaded, including MP3, WAV, SVG, and MPEG. But worry no more! We have specified the guide on how to download music from Spotify to Google Drive in the most compatible format and put them on it without a hassle. Let’s find out below.
Part 1. Best Tool to Download Music from Spotify to Google Drive
Spotify doesn’t allow users to store offline music in MP3 format on their local storage, which has hindered accessibility. Additionally, all the Spotify tracks are in OGG format encryption with Digital Rights Management, accessible only through the Spotify app. But some third-party tools can do the work for you. Not sure where to find a reliable tool? We have you covered.
AudKit Spotify Music Converter is a top-notch tool that offers music lovers a simple and effective solution to listen to Spotify music offline. With an outstanding array of features, AudKit supports a variety of output formats to select from, including MP3, AAC, FLAC, WAV, and more. This tool uses cutting-edge technology to ensure the converted Spotify audio keeps its integrity and provides an immersive listening experience.
Moreover, the lossless audio quality of the original Spotify music is retained with AudKit Spotify Music Converter. The conversion procedure is also time-optimized, resulting in a 5X higher conversion rate. Users may quickly and easily convert their preferred Spotify tracks using this tool.
Main Features of AudKit Spotify Music Downloader
- Convert and download Spotify music without premium for offline playback
- Multiple output formats are supported, including MP3, FLAC, and more
- Retain ID3 tags and the quality of Spotify for an unparalleled experience
- Provide 5X conversion speed and batch download feature
Follow this quick step-by-step tutorial to convert and save Spotify music to Google Drive using the AudKit SpotiLab Music Converter.
Step 1 Import music from Spotify to AudKit software
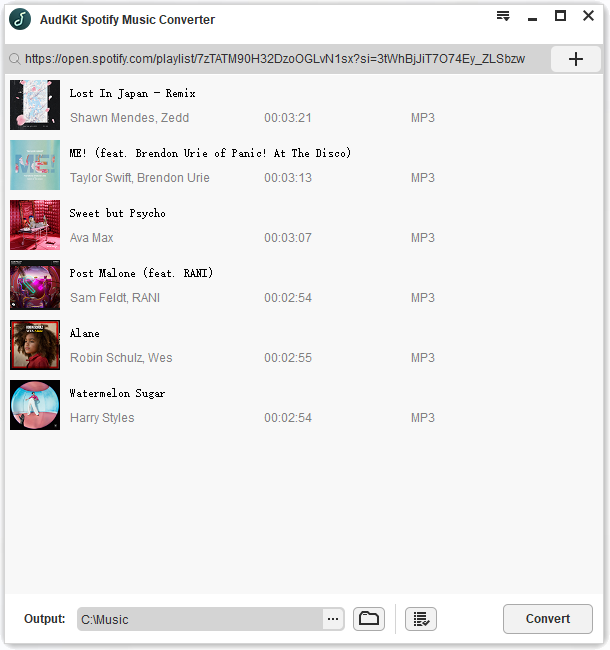
Download and install the AudKit Spotify Music Converter from its official website and launch it on your computer (Mac or Windows).
Next, head to the Spotify app and browse the music library. Then select the Spotify track or playlist you wish to convert and click the “Share” option from the dropdown and then choose “Copy Song Link“. Head back to the AudKit Spotify’s interface and paste the copied URL into the search box and click “+” to start loading Spotify tracks. For a simpler way, drag and drop the playlist or song from Spotify to the AudKit application.
Step 2 Personalize Spotify song settings for Google Drive
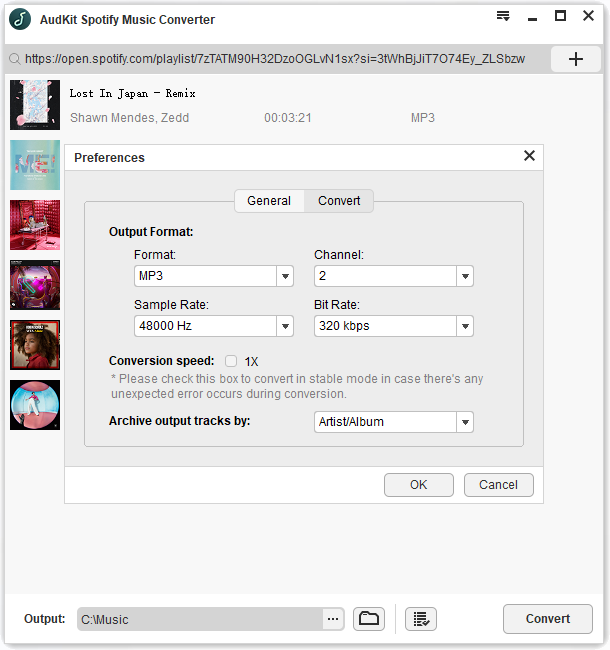
In the upper right corner of the AudKit Spotify Downloader, go to “Preferences” and tap “Convert” in the pop-up. Here you can select the format to convert Spotify to MP3, WAV, or other formats compatible with Google Drive. While for other audio preferences like channel, sample rate, bit rate, and more, customize them to suit your needs. To save the changes, click the “OK” button.
Step 3 Export music from Spotify as local files
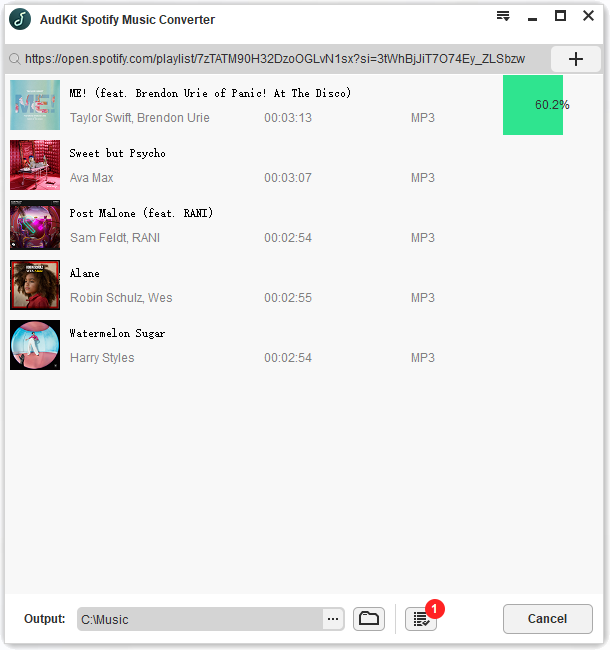
Finally, choose the “Convert” button in the lower right corner of the screen to start the conversion process. When the conversion is finished, you can locate the converted Spotify music files. To access the output folder on your computer, click the folder icon at the bottom of the AudKit converter to open the folder with audio files.
Part 2. How to Upload Spotify Music to Google Drive
Voila, that was quick and easy. Now that you’ve downloaded music from Spotify using AudKit SpotiLab Music Converter, it’s time to store it as Google Drive-compatible audio files so that you always have easy access to your favorite songs. Follow the steps below to learn how to put Spotify music to Google Drive:
Step 1: Open a web browser and log into your Google Drive account. Google Drive will be working as a storage space for the music that is downloaded by the software.
Step 2: Select “+ New” from the menu. This menu option will allow the user to select the desired file to be uploaded.
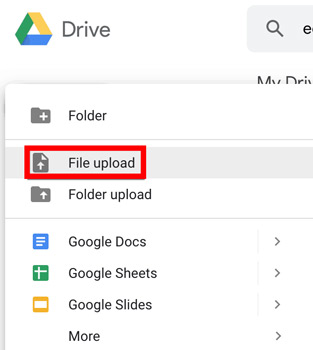
Step 3: Decide whether to “File upload” or “Folder upload“. If we select the file option, it will only show files in the folders present in our systems, and to upload an entire folder, we are allowed to upload an entire folder in one click.
Step 4: Select the converted Spotify music files or folder from your computer by browsing through them. To begin the upload, choose the “Upload” option.
Step 5: Hold on and wait until the upload is finished. When it shows a green tick, it is a sign that the file/folder has been uploaded on Google Drive.
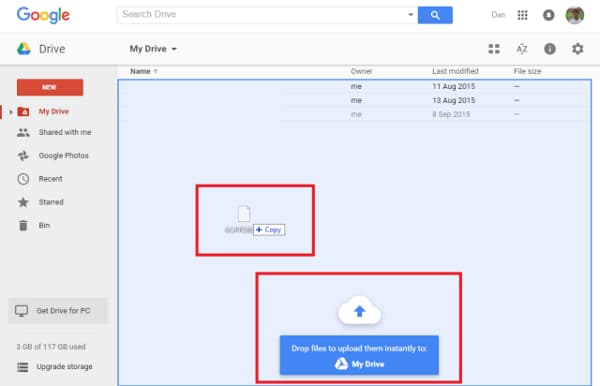
Besides, adding the files or folder by selecting them, there is a best way to upload Spotify music to Google Drive: Drag and Drop. You can create a folder in your Drive at first and then enter the folder, you can quickly place the Spotify audio files into it by dropping the music files from your computer.
And that’s it. Your exclusive Spotify tunes are now stored on Google Drive for offline listening anywhere anytime.
Part 3. Wrapping Up
Storing your favourite Spotify tracks on other platforms like Google Drive, OneDrive can be a hassle as Spotify has restrictions on its music downloads. How to download music from Spotify to Google Drive for further access? There are various ways to tweak things and download Spotify tracks into Google Drive-supported formats. Out of all, the best way is via AudKit Spotify Music Converter. It provides a smooth and effective solution thanks to its flexible output formats and quick conversion rate. With the downloaded files, you can easily tackle the obstacle alone of how to transfer music from Spotify to Google Drive.

