

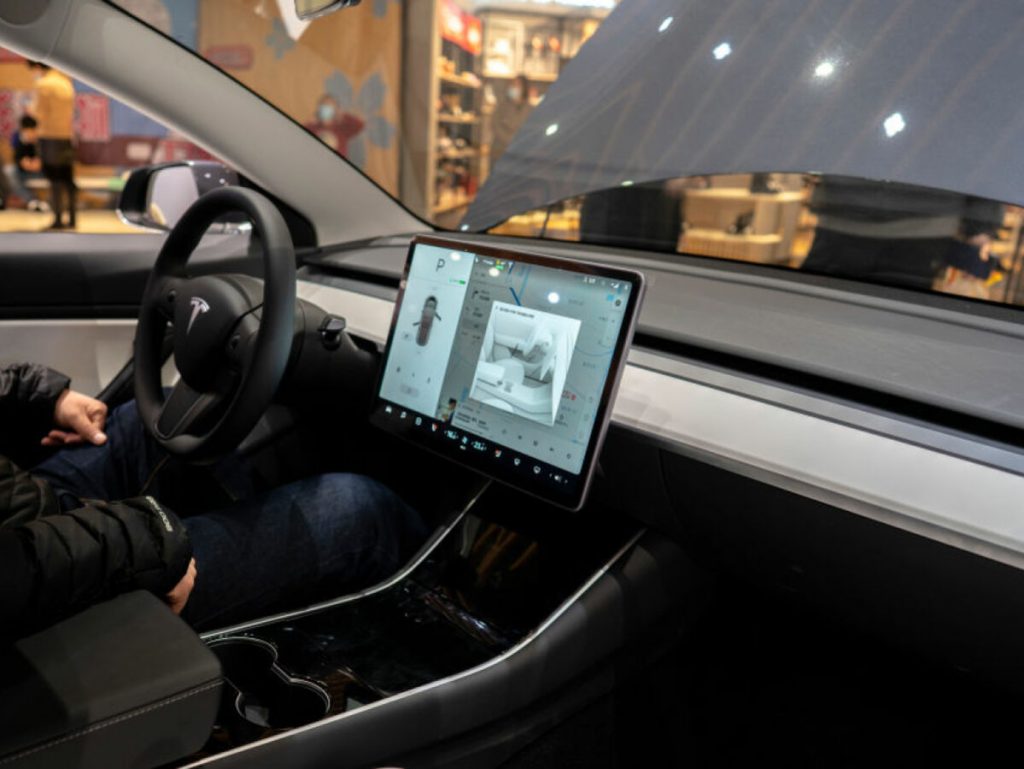
Tesla cars commonly have a wonderful sound system, which gives Tesla owners a good listening experience while driving. With the development of Tidal, now Tesla vehicles can support the streaming service Tidal. Be aware that previously only Spotify could be used on Tesla. And now Tesla owners can have the alternative of both Spotify and Tidal, which brings the gospel to people who like Tidal.
Maybe there are so many people who are not familiar with Tidal Tesla, and they will have many questions like: What is Tidal on Tesla? How can I use Tidal on Tesla?
Fortunately, this post is designed for you. Here you can know the latest news about Tesla Tidal and you can follow the tutorial to connect Tidal to your Tesla for listening.

Part 1. What Is Tidal Tesla
Tidal is a kind of streaming music service like Spotify and Apple Music. But the big distinguished difference between them is that Tidal offers better sound and streaming quality.
Spotify’s audio can reach the top of approximately 320kbps, even with the Premium subscription. In contrast, Tidal’s HiFi and Master plan offers lossless audio quality at 1,411kbps and 9,216kbps.
Now, Tesla is giving a new option of listening to Tidal in their cars other than Spotify. That means Tesla owners worldwide can now enjoy high-quality music directly in their vehicles. You can enjoy more than 70 million lossless songs on Tidal when you are driving a long way, which greatly enhances your driving experience.
Part 2. How to Connect Tidal to Tesla by Tesla Tidal App
Tesla Tidal app is specially designed to use Tidal on Tesla. You can connect Tidal to Tesla with this professional app. The detailed tutorial is as below.
Step 1. Download and install the Tesla Tidal app.
Step 2. Open the Tesla Tidal app and navigate to the “Log in” section. Log in with your Tidal account by hitting the “Web Player” option.
Step 3. Click to play your Tidal songs.
It is very easy, right? You can also subscribe to Tidal HiFi or Tidal Masters for a better listening quality.
Part 3. How to Use Tidal on Tesla via AudKit Tidizer Music Downloader
AudKit Tidizer Music Downloader is a professional tool to download or convert Tidal music as local files. And then you can upload your local files to Tesla. You can achieve using Tesla Tidal only in two steps.
Section 1. Extract Tidal as Tesla-supported Files
The first step is to convert Tidal music as local files. AudKit Tidizer Music Downloader is the best choice to download and convert Tidal music to MP3 and other common-used formats such as FLAC, WAV, AAC, etc. It can transfer any Tidal files to MP3 with a fast speed of 5X. What’s more, the transferred music remains 100% original sound quality, which can perfectly guarantee your listening experience.
Now, follow the guide below to download Tidal music to Tesla-supported local files via AudKit Tidizer Music Converter.
Main Features of AudKit Tidizer Music Converter
- Keeps 100% original audio quality and ID3 tags
- Available to convert Tidal files to Tesla and devices
- You can customize the output parameters of different Tidal songs
- Download music, playlists, podcasts, etc. as local files
Step 1 Get AudKit Tidizer Music Downloader on your computer
You need to firstly download and install AudKit Tidizer Music Downloader on your computer from its official website.
Step 2 Login on AudKit Tidizer Music Downloader
Run AudKit Tidizer Music Downloader and you will see the login interface. Log in with your Tidal account.
Step 3 Register on AudKit Tidizer Music Downloader
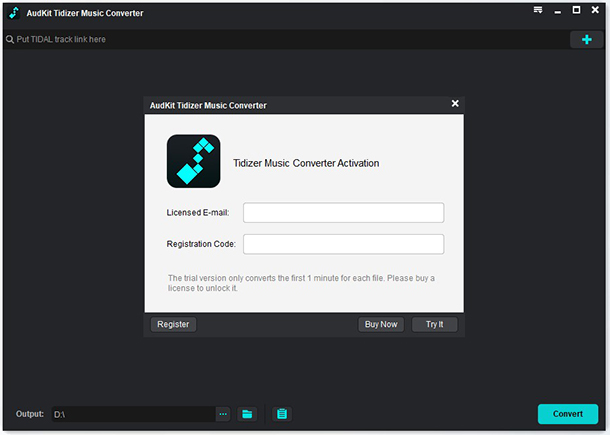
Find the menu bar at the top right of the interface. Click to find “Register” to register with your licensed E-mail. After that, you have activated the converter.
Step 4 Adjust the Tesla-supported format of Tidal
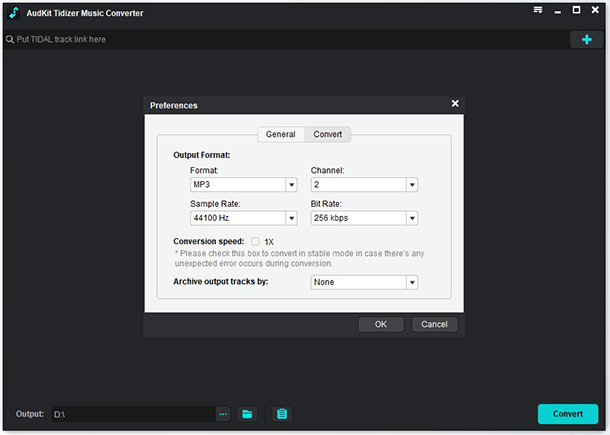
Again, click the menu bar to go to the “Preference”. Then change to the “Advanced” window, where you can adjust formats and other parameters as you want. To use Tesla Tidal, adjust the format to MP3.
Step 5 Add Tidal music to AudKit Tidizer Music Converter
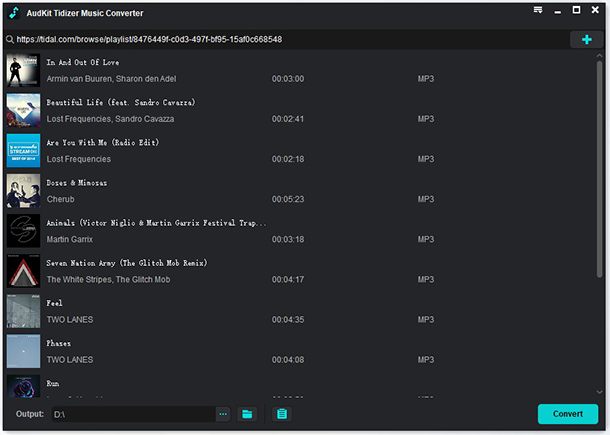
Your all playlists will show on the interface of AudKit Tidizer Music Converter after login in with your Tidal account.
Choose the playlist you would like to play on Tesla, click to open it. Then a blue “Add Music” button will show at the right corner bottom. Click it and select the whole playlist or just some songs.
Step 6 Convert Tidal music for Tesla Tidal
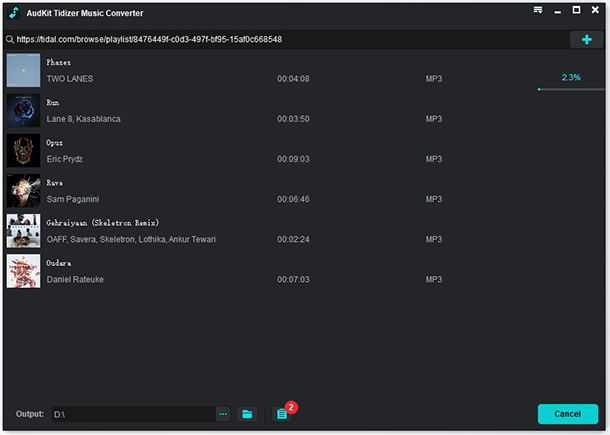
Click the “Convert” button and AudKit Tidizer Music Converter will start to convert Tesla-supported files from Tidal at a fast speed of 5X.
Section 2. Connect Tidal to Tesla via USB Drive
After downloading Tidal music as Tesla-supported files, you just need a USB drive to help you upload them to Tesla.
Step 1. Plug the USB drive into your computer and click the “Device with removable storage” option to recognize the device.
Step 2. Go to the storage folder to find your converted Tidal music. Copy and paste them to the USB drive.
Step 3. Insert the USB drive to the USB port of Tesla.
Step 4. Find your Tidal music on the USB drive and you can start to play them on your Tesla.
Conclusion
Above is all the knowledge of Tesla Tidal and the tips to connect Tidal to Tesla. There are two ways to listen to Tidal music on your Tesla. The first way is by using the app – Tesla Tidal and it’s very convenient. Another way you can use AudKit Tidizer Music Converter, and it gives you more options on playback devices.
Anyway, just choose the most suitable way to connect Tidal to Tesla according to your needs.

Elle Johnson
Elle Johnson has been working in the technology and music software field for over 5 years. She is dedicated to providing easy-to-use guides and effective tips to play music anywhere.