


Quick Answer
- What It Is: Tidal Live is an interactive, mobile-only DJ feature allowing paid subscribers to broadcast real-time music queues to followers.
- Key Requirements: Both hosts and participants need an active paid Tidal plan (Individual, Family, or Student), matching account registration countries/regions, and the iOS or Android mobile app.
- Streaming Format: Audio streams at standard AAC quality to minimize synchronization latency; HiRes FLAC and spatial audio formats are disabled during sessions.
- Bypassing Restrictions: To share Tidal playlists across unsupported desktop devices or different geographic regions without live constraints, listeners often use a dedicated third-party converter to export tracks locally.
Tidal, a popular music streaming platform, has introduced a new feature that is revolutionizing the way we share and experience music. Known as Tidal Live Session, this feature allows users to host their own live DJing session, curating a selection of tracks for friends, family, or any other Tidal users to enjoy. Follow this guide to explore how to host and join sessions, along with tips on sharing your favorite tracks seamlessly using AudKit Tidal Music Converter.

Part 1. Overview of Tidal Live Session
What are Tidal Live Sessions? It is a feature that allows Tidal users to act as a DJ, controlling the song selection and inviting others to join their listening session. This feature is available for both HiFi and HiFi Plus subscribers of the streaming service. The Live Session feature was initially tested under the “DJ” moniker and has since been rolled out to all users.
Tidal Live is different from Spotify’s Group Sessions, where all participants can control the song queue. In Live Sessions, only the initiator is in charge of the song selection and track listing. Users can only create and listen to a session in their registered country, which means they can’t host a listening party with friends from other countries.
Key Features of Tidal Live Session
1. Real-time sharing: It allows HiFi and HiFi Plus subscribers to share music with others in real-time spontaneously.
2. Host a Live session: It allows HiFi Plus members to host a Live session any time from their phone by tapping the Live button on the Now Playing screen.
3. Link sharing: The link to the Live session can be shared so that others with a paid subscription can listen along in real-time, favorite songs, and follow the host’s TIDAL profile.
4. Duration limit: Tidal Live Session has a 3-hour duration limit.
5. Subscription requirement: A HiFi or HiFi Plus subscription is required whether you’re a starter or listener.
6. Region requirement: The starter and listener should be in the same region, like the US and Canada.
7. Compatibility: Tracks in Dolby Atmos or the Sony 360 Reality format cannot be played in Live Session on Tidal.
Part 2. How to Access Live Sessions on Tidal
Live Session Tidal feature provides a new way for subscribers to share music with others, introducing rising artists to watch, marking cultural moments, and making everyday activities where music is part of people’s lives more interactive. Note that Tidal Live Session is only available for HiFi and HiFi Plus subscribers on the Tidal mobile app. Now, you can refer to the steps below to enable this feature on your mobile device.
How to Turn On/Off Tidal Live Session

Step 1. Open the Tidal app on your device.
Step 2. Go to the “Settings” menu.
Step 3. Select “My content” from the Account section.
Step 4. Toggle the “Live Session” switch to turn it on or off.
How to Start a Live Session on Tidal

Step 1. Launch the Tidal app on your Android or iOS device.
Step 2. Sign in to your Tidal account using your credentials and play any Tidal song you want to share.
Step 3. Navigate to the “Live” section at the top right corner.
Step 4. Click the “Name your session” button to customize your session name.
Step 5. Look for a “Go to Live” button on the page and click on it to start the live session.
Step 6. Once you have started the live session, you can share the session or Tidal track with other viewers or leave comments during the session.
Part 3. How to Share Tidal Music for Free Listening
While Tidal Live Session provides an immersive experience for subscribers, sharing these sessions with others can be challenging due to platform restrictions. However, with the help of AudKit Tidal Music Downloader, you can convert Tidal music into various formats and share them with friends and family for free listening. It allows you to enjoy your favorite Tidal tracks offline and share them across different devices effortlessly.
AudKit Tidal Music Converter is a tool that allows users to download Tidal music, playlists, and albums to a computer locally. It can convert Tidal music to MP3, FLAC, WAV, AAC, M4A, and M4B for higher compatibility with all devices. With the latest converting technology, it will keep Tidal HiFi and MQA lossless quality for better playback.
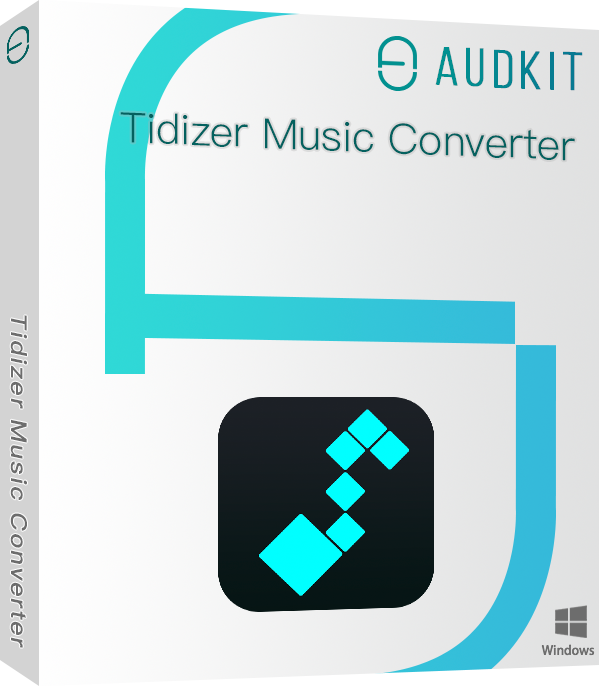
Main Features of AudKit Tidal Music Converter
- Convert Tidal tracks to MP3, FLAC, WAV, AAC, M4A, and M4B
- Download Tidal HiFi/Master tracks at a speed of 5X rate
- Maintain lossless quality and 100% ID3 tags, including the artist, title, etc.
- Customize Tidal music output quality, including bitrate, sample rate, channel, etc.
How to Download and Convert Tidal Music for Free Listening
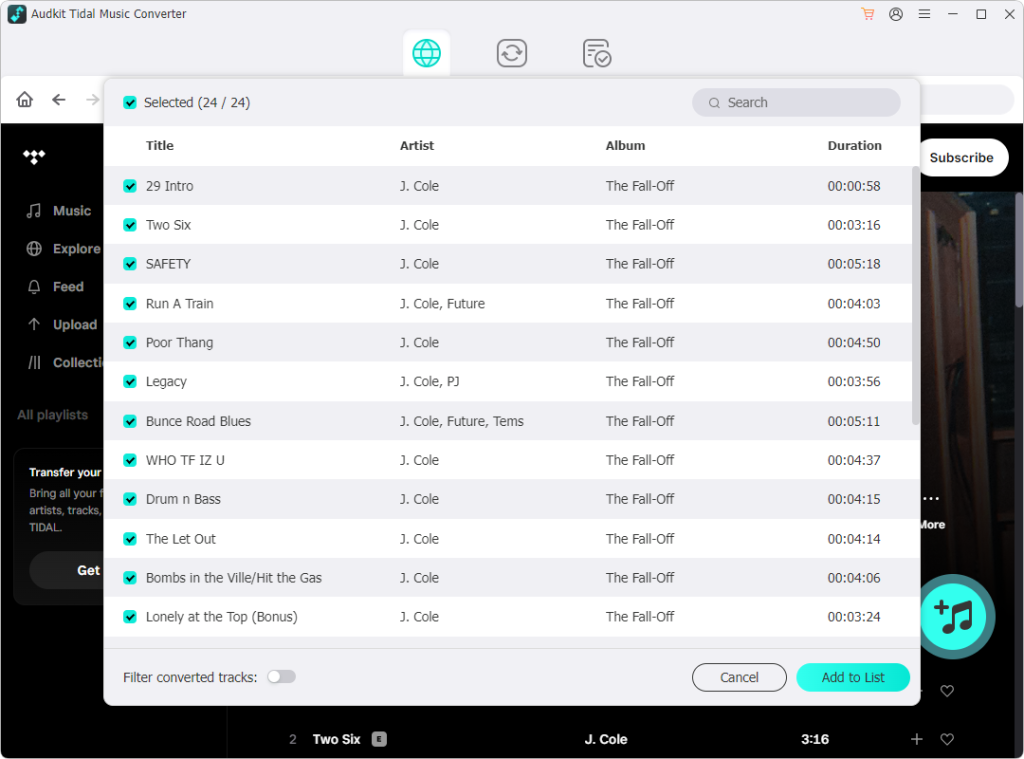
Step 1. Download and install AudKit Tidal Music Converter on your computer. Launch the software and agree to launch or relaunch the Tidal desktop client, which ensures access to your Tidal music library. Browse and select the Tidal tracks, playlists, albums, or podcasts you want to download, then drag and drop the selected items to AudKit.
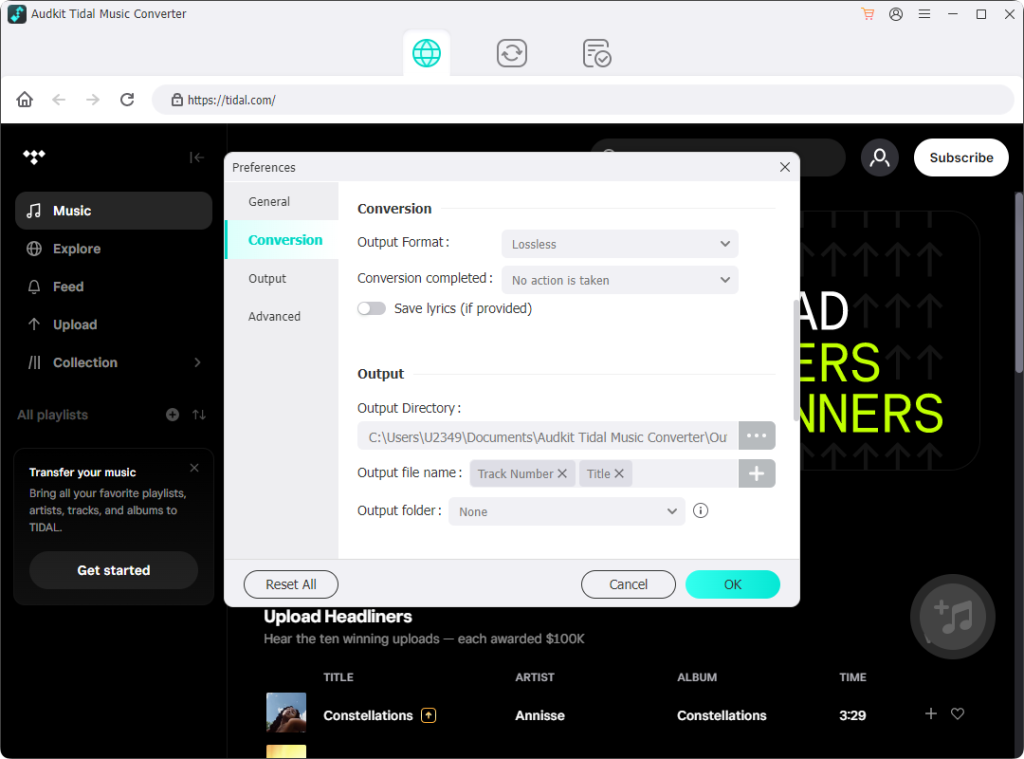
Step 2. Click on the Menu icon in the upper-right corner > Preferences > Convert, and choose the output format for Tidal music. You can also adjust other settings according to your preferences and click OK to save your preferences settings.
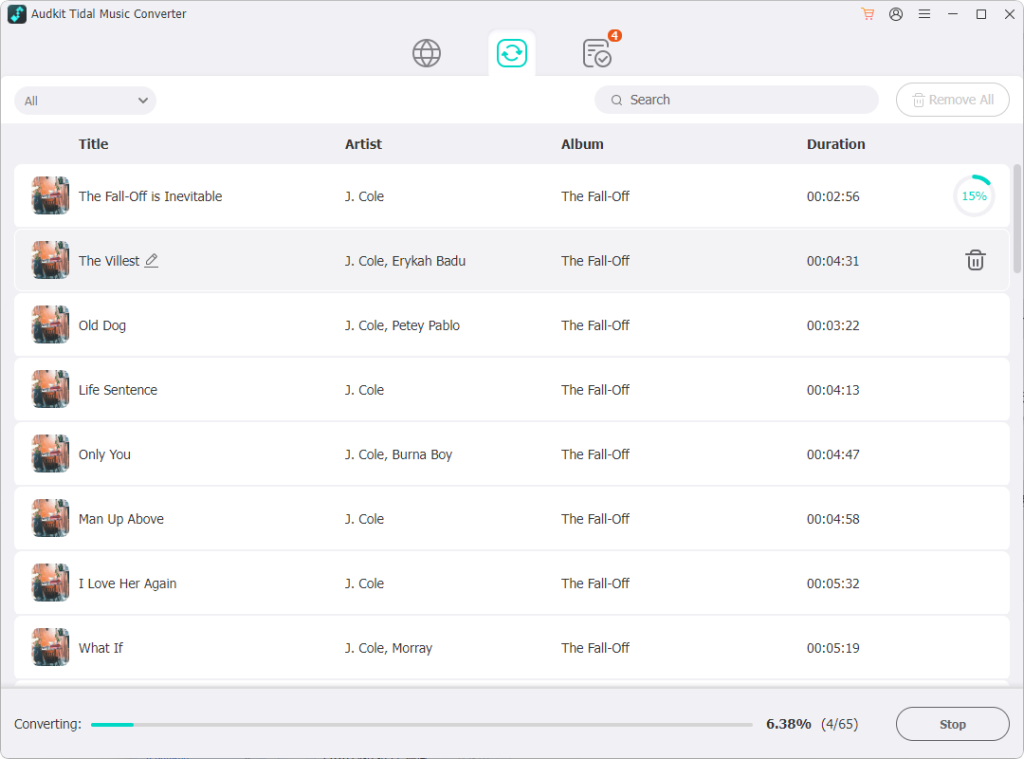
Step 3. Back to the main interface and click Convert to initiate the conversion and download process. Once the process is complete, the Tidal files will be saved on your desktop for offline playback. You can also listen to Tidal music offline on other devices or share it with others freely.
Part 4. FAQs about Tidal Live Session
Q1: Are Tidal Live Sessions available on all devices?
A: This feature can only be accessed on the Tidal mobile app.
Q2: Can Tidal Live Session be used outside of the registered country?
A: No, Live Session can only be created and listened to in the registered country.
Q3: What is the difference between Tidal Live Session and Spotify’s Group Sessions?
A: Tidal Live Session puts one person in charge of the song selection, while Spotify Group Sessions lets everyone involved control playback. Additionally, the former is only available to HiFi and HiFi Plus users, while the latter is available to all users.
Q4: What are some issues with the Tidal Live Session?
A: Some users have reported explicit content being played on Live Sessions, and there is no way to report the individual or disable the content from showing up in the app.
Q5: Why can’t my friends open or join my Tidal Live link?
A: The most common issue is a storefront mismatch or an inactive subscription. Both the host and listeners must have an active paid Tidal subscription registered in the exact same country/region, and both must open the link via the mobile app rather than a web browser.
Part 5. In Conclusion
Tidal Live Session is an engaging feature for real-time mobile DJing with friends who share an active subscription and compatible region. However, if you want permanent, restriction-free offline music sharing across any device without platform or regional boundaries, AudKit Tidal Music Converter offers the ideal companion. Choose the approach that best fits your listening style and start sharing your favorite tracks seamlessly.

Andrew Rowley
 Staff Editor
waitting