

Music listening has become a common activity for most people in the world. There are several music streaming apps that allow you to listen to any genre anywhere at any moment. Only you need to sign in to your favorite streaming app and enjoy the music. However, some people find it tough to find out which streaming app would be suitable for them. That is why almost every app offers a free trial to its users.
Likewise, Tidal is the music streaming app, which is the world’s leading music, podcast, and video streaming app focus on high-quality music. It offers a Tidal free trial period to its new users for 30 days. In this article, we will discuss the method for how to cancel the Tidal free trial. Before cancellation, you can also save the Tidal music tracks forever on your device. Heading towards the next sections for step-by-step guides.
Part 1. How Cancel Tidal Free Trial or Subscription: 4 Methods
You can cancel the Tidal free trial through Sprint, cell phone provider, credit card or PayPal, Apple Wallet, etc. Ensure that you have paid the subscription fee before the cancellation process.
1. Cancel Tidal free trial through Sprint
Here are some easy steps that you need to follow to cancel a free trial through Sprint.
Step 1: First of all, go to the official site of Sprint and log in.
Step 2: Open the ‘My Sprint’ on your mobile phone.
Step 3: Now contact Sprint Customer Service for further help.
2. Cancel Tidal free trial through a cell phone provider
If you have registered through a cell phone provider, then directly connect with the customer service department for assistance.
3. Cancel Tidal free trial through a credit card or PayPal
You need to follow the below steps to cancel your Tidal subscription after the free trial.
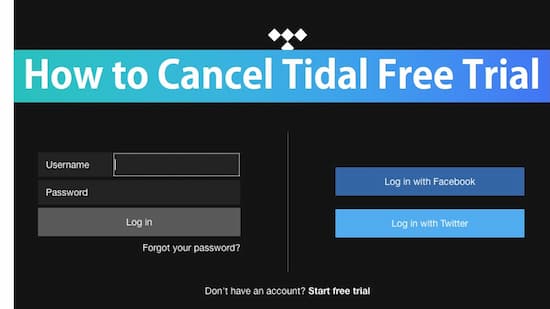
Step 1: Go to Tidal Website. Then enter your valid username and password.
Step 2: Select the ‘Subscription’ option.
Step 3: Choose the ‘Cancel my Subscription’ option and then confirm it.
4. Cancel Tidal free trial through Apple Wallet
Here are the simplest steps that you need to follow to cancel the subscriptions that you purchased from Apple Wallet.
Step 1: Open the ‘Settings’ app. Then tap your name > Subscriptions.
Step 2: Now tap the desired subscriptions that you want to manage.
Step 3: Click the ‘Cancel Subscription’ option. In the case when you don’t see Cancel, The subscription is already canceled and won’t renew.
Part 2. How to Keep Tidal Tracks After You Cancel Tidal Free Trial
Most of the time, when you cancel the subscriptions of music streaming services, all the downloaded music tracks from them will be expired. They will no longer be available for protecting the music copyrights. Similarly, Tidal removes all the downloaded tracks when you canceled the subscription. To cope up with this situation, AudKit Tidizer Music Converter will assist you.
This dedicated Tidal music converter will download tracks or playlists from Tidal to MP3, AAC, FLAC, M4A, or M4B with keeping the original audio quality. The converted Tidal songs still save on the local computer after you cancel the Tidal subscription. You can offline listen to these Tidal songs forever even without using the Tidal app.
Moreover, this smart converter offers full options to customize the output settings, such as bit rate, sample rate, channel, and codec. You can manage and organize the music library according to any unique needs. With the super-fast 5X downloading speed, the AudKit Tidizer converter will make your expectations high.
Main Features of AudKit Tidizer Music Converter
- Supports multiple output formats
- Listen to the songs without the official app
- 5X high conversion speed for Windows
- Access Spotify music library on any device
Now download and install the converter app on your device. Then follow the below steps to save the Tidal music even after the cancellation of the subscription.
Step 1 Add the Tidal songs or playlists
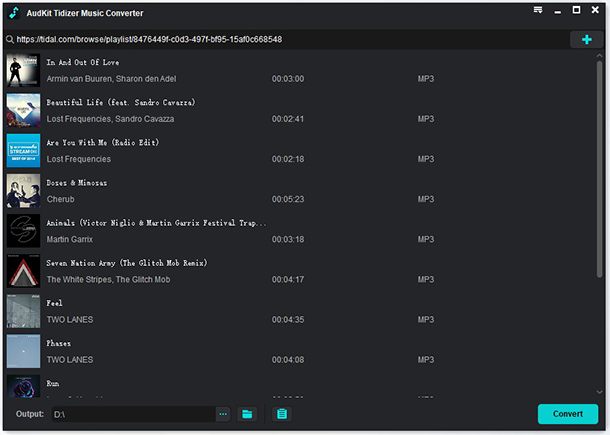
Firstly, you need to add the music files that you want to convert and download. Browse through the app and choose the playlist or soundtrack. Click the three-dot icon, choose the ‘Share’ > ‘Copy Playlist Link’ options. Now paste the copied song link to the search box of the AudKit converter. Tap the ‘+’ button to load the tracks.
Step 2 Customize Tidal output settings
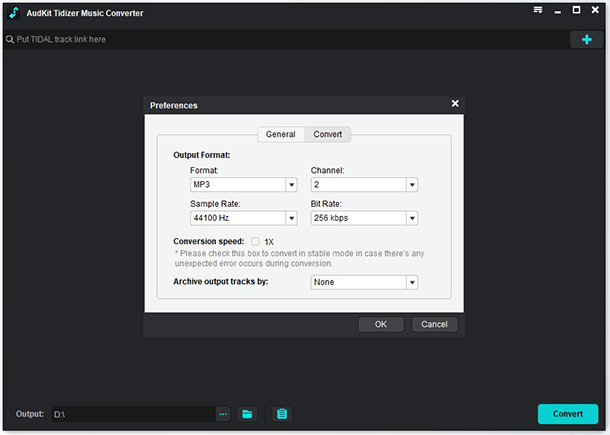
From the top menu, choose the ‘Preferences’ option. From the pop-up window, you can go to the ‘Convert’ section to define the output format as MP3, AAC, FLAC, WAV, M4A, or M4B. The users can also customize the other output formats such as bit rate, sample rate, channel, or codec.
Step 3 Begin the conversion process
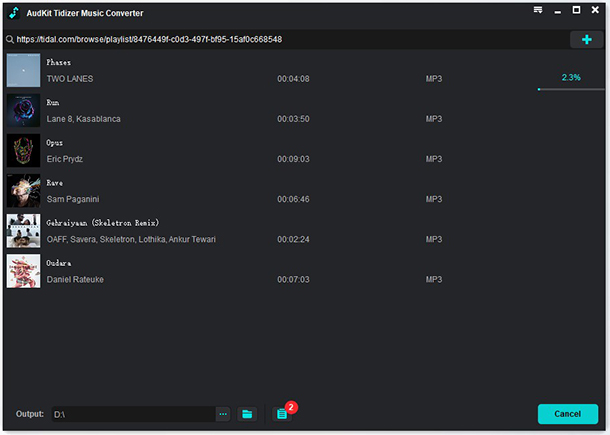
After all the settings, choose the ‘Convert’ option at the bottom-right corner of the main window to begin the downloading process. The converter will begin the converting process to convert the Tidal music into local output files. You can locate the downloaded files on the destination folder on your computer. Transfer the songs on any device and enjoy on the way.
Part 3. Conclusion
Now you have all the answers to the question of ‘How to cancel my Tidal free trial on PC?‘ We have explained the way to cancel Tidal subscriptions through Sprint, Apple Wallet, and more. Even you don’t have to worry about the expiration of the Tidal songs after the cancellation because AudKit Tidizer Music Converter will help you to convert and save the music forever on your device.

Elle Johnson
Elle Johnson has been working in the technology and music software field for over 5 years. She is dedicated to providing easy-to-use guides and effective tips to play music anywhere.